DaRK Development And Research Kit 3.0 Scraper Crawler Preview Webmaster Utilities

Stand Alone Flask Application

Stand Alone Flask Application Template By K0NxT3D

The Stand Alone Flask Application Template is a minimal yet powerful starting point for creating Flask-based web UI applications. Developed by K0NxT3D, this template is designed to run a Flask app that can be deployed easily on a local machine. It features an embedded HTML template with Bootstrap CSS for responsive design, the Oswald font for style, and a simple yet effective shutdown mechanism. Here’s a detailed look at how it works and how you can use it.


Stand Alone Flask Application – Key Features

  1. Basic Flask Setup
    The template leverages Flask, a lightweight Python web framework, to build a minimal web application. The app is configured to run on port 26001, with versioning details and a friendly app name displayed in the user interface.
  2. Embedded HTML Template
    The HTML template is embedded directly within the Flask application code using render_template_string(). This ensures that the application is fully self-contained and does not require external HTML files.
  3. Bootstrap Integration
    The application uses Bootstrap 5 for responsive UI components, ensuring that the application adapts to different screen sizes. Key elements like buttons, form controls, and navigation are styled with Bootstrap’s predefined classes.
  4. Oswald Font
    The Oswald font is embedded via Google Fonts, giving the application a modern, clean look. This font is applied globally to the body and header elements.
  5. Shutdown Logic
    One of the standout features is the built-in shutdown mechanism, allowing the Flask server to be stopped safely. The /exit route is specifically designed to gracefully shut down the server, with a redirect and a JavaScript timeout to ensure the application closes cleanly.
  6. Automatic Browser Launch
    When the application is started, the script automatically opens the default web browser to the local Flask URL. This is done by the open_browser() function, which runs in a separate thread to avoid blocking the main Flask server.

How The Stand Alone Flask Application Works

1. Application Setup

The core setup includes the following elements:

TITLE = "Flask Template"
VERSION = '1.0.0'
APPNAME = f"{TITLE} {VERSION}"
PORT = 26001
app = Flask(TITLE)

This sets the title, version, and application name, which are used throughout the app’s user interface. The PORT is set to 26001 and can be adjusted as necessary.

2. Main Route (/)

The main route (/) renders the HTML page, displaying the app title, version, and a button to exit the application:

@app.route('/', methods=['GET', 'POST'])
def index():
return render_template_string(TEMPLATE, appname=APPNAME, title=TITLE, version=VERSION)

This route serves the home page with an HTML template that includes Bootstrap styling and the Oswald font.

3. Shutdown Route (/exit)

The /exit route allows the server to shut down gracefully. It checks that the request is coming from localhost (to avoid unauthorized shutdowns) and uses JavaScript to redirect to an exit page, which informs the user that the application has been terminated.

@app.route('/exit', methods=['GET'])
def exit_app():
if request.remote_addr != '127.0.0.1':
return "Forbidden", 403
Timer(1, os._exit, args=[0]).start() # Shutdown Server
return render_template_string(html_content, appname=APPNAME, title=TITLE, version=VERSION)

This section includes a timer that schedules the server’s termination after 1 second, allowing the browser to process the redirect.

4. HTML Template

The embedded HTML template includes:

  • Responsive Design: Using Bootstrap, the layout adapts to different devices.
  • App Title and Version: Dynamically displayed in the header.
  • Exit Button: Allows users to gracefully shut down the application.
<header>
<span class="AppTitle" id="title">{{title}} {{version}}</span>
</header>

This structure creates a clean, visually appealing user interface, with all styling contained within the app itself.

5. Automatic Browser Launch

The following function ensures that the web browser opens automatically when the Flask app is launched:

def open_browser():
webbrowser.open(f"http://127.0.0.1:{PORT}")

This function is executed in a separate thread to avoid blocking the Flask server from starting.


How to Use the Template

  1. Install Dependencies:
    Ensure that your requirements.txt includes the following:

    Flask==2.0.3

    Install the dependencies with pip install -r requirements.txt.

  2. Run the Application:
    Start the Flask application by running the script:

    python app.py

    This will launch the server, open the browser to the local URL (http://127.0.0.1:26001), and serve the application.

  3. Exit the Application:
    You can shut down the application by clicking the “Exit Application” button, which triggers the shutdown route (/exit).

Why Use This Template?

This template is ideal for developers looking for a simple and straightforward Flask application to use as a base for a web UI. It’s particularly useful for local or single-user applications where quick setup and ease of use are essential. The built-in shutdown functionality and automatic browser launch make it even more convenient for developers and testers.

Additionally, the use of Bootstrap ensures that the UI will look good across all devices without requiring complex CSS work, making it a great starting point for any project that needs a web interface.


The Stand Alone Flask Application Template by K0NxT3D is an efficient and versatile starting point for building simple Flask applications. Its integrated features, including automatic browser launching, shutdown capabilities, and embedded Bootstrap UI, make it a powerful tool for developers looking to create standalone web applications with minimal setup.

Seaverns Web Development Coding Security Applications and Software Development Bex Severus Galleries Digital Art & Photography

Apache LAMP Install Script

Apache LAMP Install Script

Here’s a full Apache LAMP Install Script for setting up aa LAMP stack on Ubuntu (assuming Linux is excluded from the setup), including the installation and configuration of Apache, PHP, MySQL, and phpMyAdmin. The script also includes basic Apache configurations, enabling modules like mod_rewrite, and configuring phpMyAdmin with secure settings.

Full Apache LAMP Install Script
(for Ubuntu-based systems):


#!/bin/bash

# Update and upgrade the system
sudo apt update -y
sudo apt upgrade -y

# Add PPA for PHP and Apache
echo "Adding PPA repositories for PHP and Apache..."
sudo add-apt-repository ppa:ondrej/php -y
sudo add-apt-repository ppa:ondrej/apache2 -y
sudo apt update -y

# Install Apache2
echo "Installing Apache2..."
sudo apt install apache2 -y

# Install PHP and commonly used extensions
echo "Installing PHP and extensions..."
sudo apt install php libapache2-mod-php php-cli php-mysql php-curl php-gd php-xml php-mbstring php-zip php-soap -y

# Install MySQL Server and secure the installation
echo "Installing MySQL Server..."
sudo apt install mysql-server -y

# Run MySQL Secure Installation
echo "Securing MySQL installation..."
sudo mysql_secure_installation

# Install phpMyAdmin
echo "Installing phpMyAdmin..."
sudo apt install phpmyadmin php-mbstring php-zip php-gd php-json php-curl -y

# Link phpMyAdmin to Apache web directory
echo "Configuring phpMyAdmin..."
sudo ln -s /usr/share/phpmyadmin /var/www/html/phpmyadmin

# Set permissions for phpMyAdmin
echo "Setting permissions for phpMyAdmin..."
sudo chown -R www-data:www-data /usr/share/phpmyadmin
sudo chmod -R 755 /usr/share/phpmyadmin

# Enable Apache modules
echo "Enabling Apache modules..."
sudo a2enmod rewrite
sudo a2enmod headers
sudo a2enmod ssl

# Set up basic Apache configurations (security headers, etc.)
echo "Configuring Apache settings..."
echo '
<IfModule mod_headers.c>
Header always set X-Content-Type-Options "nosniff"
Header always set X-XSS-Protection "1; mode=block"
Header always set X-Frame-Options "SAMEORIGIN"
Header always set Referrer-Policy "no-referrer"
</IfModule>

<IfModule mod_rewrite.c>
RewriteEngine On
RewriteCond %{REQUEST_FILENAME} !-f
RewriteCond %{REQUEST_FILENAME} !-d
RewriteRule ^(.+)$ /index.php [QSA,L]
</IfModule>
' | sudo tee /etc/apache2/conf-available/security_headers.conf > /dev/null

# Enable custom security headers configuration
sudo a2enconf security_headers

# Enable and restart Apache and MySQL services
echo "Restarting Apache and MySQL..."
sudo systemctl restart apache2
sudo systemctl restart mysql

# Set MySQL to start on boot
echo "Ensuring MySQL starts on boot..."
sudo systemctl enable mysql

# Test Apache and MySQL installation
echo "Testing Apache and MySQL..."
sudo systemctl status apache2
sudo systemctl status mysql

# Configure phpMyAdmin with MySQL (Optional, run if needed)
echo "Configuring phpMyAdmin to work with MySQL..."
# Create a user for phpMyAdmin in MySQL
sudo mysql -u root -p -e "CREATE USER 'phpmyadmin'@'localhost' IDENTIFIED BY 'phpmyadminpassword';"
sudo mysql -u root -p -e "GRANT ALL PRIVILEGES ON *.* TO 'phpmyadmin'@'localhost' WITH GRANT OPTION; FLUSH PRIVILEGES;"

echo "LAMP stack installation complete!"


Breakdown of the Apache LAMP Install Script:

  1. System Updates:
    • Updates the package list and upgrades the system to ensure it is up-to-date.
  2. PPA for PHP and Apache:
    • Adds the PPA repositories for the latest PHP and Apache versions (ppa:ondrej/php and ppa:ondrej/apache2).
  3. Apache2 Installation:
    • Installs the Apache web server.
  4. PHP Installation:
    • Installs PHP along with some common PHP extensions (like MySQL, CURL, GD, MBString, XML, and SOAP).
  5. MySQL Installation and Security Setup:
    • Installs MySQL and runs the mysql_secure_installation script to secure the MySQL installation (you’ll need to set a root password and answer security questions).
  6. phpMyAdmin Installation:
    • Installs phpMyAdmin and relevant PHP extensions. It then configures it to be accessible via the Apache web server.
  7. Enabling Apache Modules:
    • Enables the mod_rewrite, mod_headers, and mod_ssl modules for security and functionality.
  8. Apache Basic Configuration:
    • Sets up HTTP security headers and enables the mod_rewrite rule to handle URL rewriting in Apache.
  9. Restart Services:
    • Restarts Apache and MySQL services to apply changes.
  10. Test:
    • Verifies that Apache and MySQL services are running properly.
  11. MySQL User for phpMyAdmin (Optional):
    • Creates a user for phpMyAdmin in MySQL with the necessary privileges. You can customize the password and user details.

Additional Notes:

  • MySQL Secure Installation: This script will invoke the mysql_secure_installation command during execution. You will be prompted to configure your MySQL root password and set other security options interactively.
  • phpMyAdmin: By default, phpMyAdmin will be accessible at http://your-server-ip/phpmyadmin after running this script. Make sure to adjust any security settings (e.g., .htaccess protection) for production environments.
  • Permissions: The script ensures that phpMyAdmin has proper file permissions to function correctly under the web server’s user (www-data).
PHP (Hypertext Preprocessor) is a widely-used open-source server-side scripting language designed primarily for web development.

Php

What is PHP?

PHP (Hypertext Preprocessor) is a widely-used open-source server-side scripting language designed primarily for web development. It can be embedded into HTML, making it particularly suited for creating dynamic web pages. PHP code is executed on the server, generating HTML that is sent to the client’s browser.

What It’s Used For

PHP is versatile and can be used for various purposes:

  1. Web Development: PHP is commonly used to build dynamic websites and web applications. It processes server-side logic and interacts with databases to generate web pages dynamically.
  2. Content Management Systems (CMS): Many popular CMS platforms, such as WordPress, Joomla, and Drupal, are built using PHP. These platforms allow users to manage website content easily without needing extensive programming knowledge.
  3. E-commerce Platforms: PHP powers many e-commerce solutions like Magento and WooCommerce, providing functionality for online stores, including product management, shopping carts, and payment processing.
  4. Web Services: PHP is used to create APIs (Application Programming Interfaces) that allow different applications to communicate and exchange data.
  5. Database Management: PHP can interact with various databases (like MySQL, PostgreSQL) to handle data operations such as storage, retrieval, and manipulation.
  6. Server-Side Scripting: PHP handles tasks on the server before the page is sent to the user, such as form processing, session management, and file handling.

Institutions That Use PHP

PHP is utilized across various sectors and institutions:

  1. Tech Companies: Many technology firms use PHP for developing web applications and platforms. Companies like Facebook and Wikipedia have utilized PHP in their tech stacks.
  2. Educational Institutions: Universities and colleges use PHP to develop educational platforms, student management systems, and online learning tools.
  3. Government Agencies: Government websites and services often use PHP for web development due to its flexibility and ease of use.
  4. Nonprofits: Many nonprofit organizations use PHP-based systems to manage their websites, donation platforms, and community outreach tools.
  5. Businesses: From small businesses to large enterprises, PHP is used to develop company websites, intranets, and customer-facing applications.

Security and Vulnerabilities

Security:

  1. Access Control: PHP provides mechanisms to handle user authentication and authorization, though the implementation quality depends on the developer.
  2. Data Sanitization: Proper data sanitization and validation are essential in PHP to prevent common vulnerabilities like SQL injection and cross-site scripting (XSS).
  3. Secure Configuration: PHP allows for secure configurations, such as disabling dangerous functions and controlling error reporting to prevent sensitive information leakage.
  4. Regular Updates: PHP is actively maintained, with security patches and updates released to address vulnerabilities and improve security.

Vulnerabilities:

  1. SQL Injection: PHP applications that interact with databases can be vulnerable to SQL injection attacks if they do not use prepared statements or proper escaping techniques.
  2. Cross-Site Scripting (XSS): Improper handling of user input can lead to XSS attacks, where malicious scripts are executed in the user’s browser.
  3. Remote Code Execution: Vulnerabilities in PHP code or server configurations can potentially allow attackers to execute arbitrary code on the server.
  4. Deprecated Functions: Using outdated or deprecated PHP functions can expose applications to security risks. It is important to stay updated with the latest PHP versions and best practices.

Resources

Here are some useful resources for learning more about PHP:

  1. PHP Official Website – The main site for PHP, including downloads, documentation, and news.
  2. PHP Manual – Comprehensive documentation covering PHP functions, features, and usage examples.
  3. PHP The Right Way – A community-driven guide to best practices and modern PHP development.
  4. W3Schools PHP Tutorial – An interactive tutorial for learning PHP from basics to advanced topics.
  5. PHP Security Best Practices – Recommendations and guidelines for securing PHP applications.

This overview provides a detailed understanding of PHP, its uses, security considerations, and available resources for further learning.

Linux Apache MySQL Php LAMP Server

MySQL

What is MySQL?

MySQL is an open-source relational database management system (RDBMS) that is widely used for managing and organizing data in a structured manner. Developed and maintained by Oracle Corporation, MySQL uses Structured Query Language (SQL) to handle database tasks such as data retrieval, insertion, updating, and deletion.

What It’s Used For

MySQL is versatile and can be used in a variety of contexts:

  1. Web Applications: It’s commonly used in conjunction with PHP and Apache in the LAMP (Linux, Apache, MySQL, PHP/Perl/Python) stack for developing web applications.
  2. Data Storage: It stores data in a tabular format, which is suitable for applications requiring structured data storage, such as CRM systems, e-commerce sites, and content management systems (CMS).
  3. Analytics and Reporting: Businesses use MySQL to store and query large datasets, performing operations like complex joins, aggregations, and reporting.
  4. Application Development: Developers use MySQL for backend databases in applications due to its reliability and performance.
  5. Business Applications: It supports enterprise-level applications and ERP systems by managing large volumes of transactional data.

Institutions That Use MySQL

MySQL is used by a wide range of institutions:

  1. Tech Companies: Many tech giants and startups use MySQL, including Facebook, Twitter, and Google, for various internal systems and services.
  2. Educational Institutions: Universities and research organizations use MySQL for managing research data, student records, and educational content.
  3. Financial Institutions: Banks and financial services use MySQL for transactional data, customer management, and compliance-related applications.
  4. Government Agencies: Government departments use MySQL for managing public records, administrative data, and service delivery systems.
  5. Healthcare: Hospitals and clinics use MySQL for patient records, appointment scheduling, and medical data management.

Security and Vulnerabilities

Security:

  1. Access Control: MySQL supports user authentication and permissions, allowing administrators to control who can access or modify data.
  2. Encryption: It offers data-at-rest and data-in-transit encryption options to protect sensitive information.
  3. Audit Logging: It can log queries and changes to monitor and detect suspicious activity.
  4. Security Updates: Regular updates and patches are released to address security vulnerabilities.

Vulnerabilities:

  1. SQL Injection: Like other SQL-based systems, MySQL can be vulnerable to SQL injection attacks if applications do not properly sanitize user input.
  2. Misconfigurations: Incorrectly configured MySQL installations can lead to security issues, such as unauthorized data access.
  3. Outdated Versions: Running outdated versions without the latest security patches can expose the database to known vulnerabilities.
  4. Backup Security: If not properly secured, backup files can be a target for data breaches.

Resources

Here are some useful resources for learning more about MySQL:

  1. MySQL Official Website – The main site for downloads, documentation, and product information.
  2. MySQL Documentation – Comprehensive documentation covering installation, configuration, and usage.
  3. MySQL Tutorial – A resource for learning MySQL through tutorials and examples.
  4. MySQL Forums – A place to ask questions and engage with the MySQL community.
  5. MySQL Security Best Practices – Guidelines and recommendations for securing MySQL installations.

This overview should give you a solid understanding of MySQL, its uses, and its security aspects.

Coding, Security & Web Development

Senya 2.0 MySQL Database Editor

Senya – MySQL Database Editor

Sleek and easy to use MySQL Database Editor.
Enter Server Configuration Manually Or Automatically From File.

By: K0NxT3D
Version: 2.0.1
URL: http://www.seaverns.com/senya/
File: Senya_2.0.zip
Senya 2.0 Files:
index.php – Main Page
display_table.php – Display MySQL Tables
update.php – Update MySQL Tables
style.css – Default Style
saved_hosts.txt – Example Autoload Configuration File

K0NxT3D

Senya 1.0 Cross Domain WordPress Data Mining Utility

Сеня 1.0 (Senya 1.0)

Senya 1.0 Cross Domain WordPress Data Mining Utility

Сеня 1.0 – K0NxT3D 2024
Back End WordPress Utility

Features:

  • Edit WordPress Database.
  • Edit WordPress User Tables.
  • Edit WordPress User Information.
  • Display WordPress Domain and Associated Admin Email Addresses Across Multiple Domains.

A simple and easy to use PHP/HTML Based MySQL Back End Connection Utility with Editing Capabilities and Email Harvesting across Multiple Domains.

Download

Facebook Data Centers Project

I collect a lot of data and data mining is just one of those things that I enjoy.
I build Web Crawlers and Web Scrapers often, but I really love tracking other
bots, some of which I’ve “known” for decades now.

With the ever expanding Facebook Empire, I’ve been catching a lot of the
hits from FacebookExternalHit,
[ facebookexternalhit/1.1 (+http://www.facebook.com/externalhit_uatext.php) ]
and while Facebook it’self is being overrun by nefarious bots and hacked accounts,
their problem is my solution.

The majority of the hits from FacebookExternalHit have preceded an attack, which tells me several things.
1: Facebook For Developers has given nefarious actors an edge on the Facebook user and I won’t go into detail on that, but I can make better informed security decisions based on what can be done from that side of the platform.

2: I can test my security software on both Facebook and my websites by simply posting a link to Facebook and this is really handy in my line of work. I get to see which Data Center the bot is coming from (GeoLocation), how many bots that particular Data Center has (Interesting Data There) and how fast the reaction time is, which helps determine the software being used and in which manner it’s being used.

3: Most Importantly, it gives me reasons to build new software.

So, I built this database for such purpose as to collect more data on the situation and there’s some interesting patterns developing. While it’s not exactly something I feel the urge to release, it’s worth sharing.

FBDC uses Php and MySQL, a pretty simple database and small file sizes (I like small files).
The User Input Form Works.. Ikr, a form that works??
It has a few things left to work out on the user input; I’m a big fan of getting my hands dirty,
so Updating the Data Center / BotInfo is being done via phpmyadmin until I build a better form.
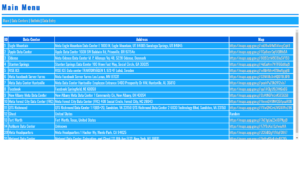
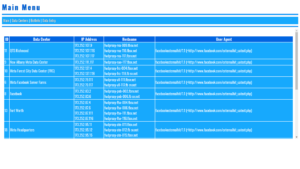
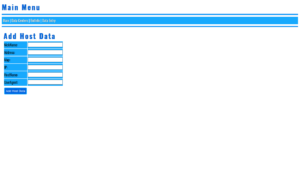
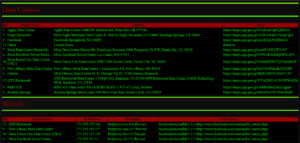
Here’s a few screenshots:

FBDC - Facebook Data Centers and FacebookExternalHit Bot Collected Data

FBDC – Facebook Data Centers and FacebookExternalHit Bot Collected Data – Main Menu


FBDC - Facebook Data Centers and FacebookExternalHit Bot Collected Data

FBDC – Facebook Data Centers and FacebookExternalHit Bot Collected Data – Data Center List


FBDC - Facebook Data Centers and FacebookExternalHit Bot Collected Data

FBDC – Facebook Data Centers and FacebookExternalHit Bot Collected Data – BotInfo List


FBDC - Facebook Data Centers and FacebookExternalHit Bot Collected Data

FBDC – Facebook Data Centers and FacebookExternalHit Bot Collected Data – User Input Form


FBDC - Facebook Data Centers and FacebookExternalHit Bot Collected Data

FBDC – Facebook Data Centers and FacebookExternalHit Bot Collected Data – Because There HAS to be a Hacker Theme too.

DSX "Pure SEO" Content Management System

DSX DS7-1.2.5 Content Management System

DSX Version 7-1.2.5 (DS7) “Pure SEO” Content Management System. (Release Update V7-1.2.5)

While this CMS is considered “Black Hat”, it is what it is and it works.
Search Engines have priorities in what ranks and what doesn’t rank and
the single most important things anyone who wants the Top Ten knows are,
that your pages have to load fast, your content has to be abundant, thick and most
of all Hypertext Links.

DSX Delivers on all aspects of Fast Ranking “Pure SEO” tactics that I’ve developed
over the last 20+ years as a Professional SEO Expert and I stand behind my work.
I’m offering DSX 7-1.2.5 at a Very affordable price because it’s very small at this
point and that makes it relatively easy for you to make more of it or if you’re patient,
wait for the next version with far more features.

Installation & Troubleshooting.
View Demo
Server Status Monitor PhP Code

PhP Monitor Active and Inactive Servers

This is a simple and no frills way to monitor your servers.
You will need to create the file “urls.txt” in the same folder as the “active-servers.php” file.

Examples – urls.txt:
https://www.my-website.com/
http://localhost/
http://www.my-website.com/some/page.php

Navigate to the active-servers.php file. ( http://www.your-site.com/scripts/active-servers.php)
Online Servers will be Lime and Offline Servers, Red.

active-servers.php

<head>
<title>Active Servers</title>
</head>
<body style=”background-color: #0c0c0c;”>
<div>
<table width=”100%” height=”100%”>
<tr>
<td>
<table style=”margin-bottom: 100%;text-transform: uppercase;”>
<?php
$fn = fopen(“urls.txt”,”r”);
while(! feof($fn)) {
$result = fgets($fn);
$server=gethostbyname(parse_url($result, PHP_URL_HOST));
if (fsockopen($server, 80)){
echo (‘ <tr><td><b><a style=”color: Lime; text-decoration: none;”href=”‘.$result.'” target=”viewer”>’.$result.'</b></td></tr>’. “\r\n”);
} else
{
echo (‘ <tr><td style=”color: #a00000″>’.$result.'</td></tr>’. “\r\n”);
}

} fclose($fn); ?>

</table>
</td>
<td width=”100%”><iframe align=”right” class=”viewpanel” src=”” name=”viewer” frameborder=”0″ width=”100%” height=”600px”></iframe></td>
</tr>
</table>
</div>
</body>

Spoofing Random Toys MySql WordPress Form Data Fields

Fake Email Generator Create Random Email Addresses From Files

This is just a fun little toy that happened while working on MySQL Automation.
The files used are first_names.txt, last_names.txt and domains.txt.
Reading random lines from the files in order creates the “Fake Email Address” and using [array_rand($variable)]; each email address is somewhat unique as I’m only using 80,000 names (give or take a few hundred).

All Files: fake-email-generator.zip


#!/bin/bash
$first_names = 'first_names.txt';
$last_names = 'last_names.txt';
$dom = 'domains.txt';

    $firstname = file($first_names);
    $fdata = $firstname[array_rand($firstname)];
    $first = $fdata;

        $lastname = file($last_names);
        $ldata = $lastname[array_rand($lastname)];
        $last = $ldata;

    $comd = file($dom);
    $edata = $comd[array_rand($comd)];
    $com = $edata;

        $first = preg_replace('/\s+/', '', $first);
        $first = strtolower($first);
        $last = preg_replace('/\s+/', '', $last);
        $last = strtolower($last);
        $com = preg_replace('/\s+/', '', $com);

    echo $first."@".$last.$com;]