DaRK Development And Research Kit 3.0 Scraper Crawler Preview Webmaster Utilities

DaRK Development and Research Kit 3.0

DaRK – Development and Research Kit 3.0 [Master Edition]:
Revolutionizing Web Scraping and Development Tools

DaRK – Development and Research Kit 3.0 (Master Edition) is an advanced, standalone Python application designed for developers, researchers, and cybersecurity professionals. This tool streamlines the process of web scraping, web page analysis, and HTML code generation, all while integrating features such as anonymous browsing through Tor, automatic user-agent rotation, and a deep scraping mechanism for extracting content from any website.

Key Features and Capabilities
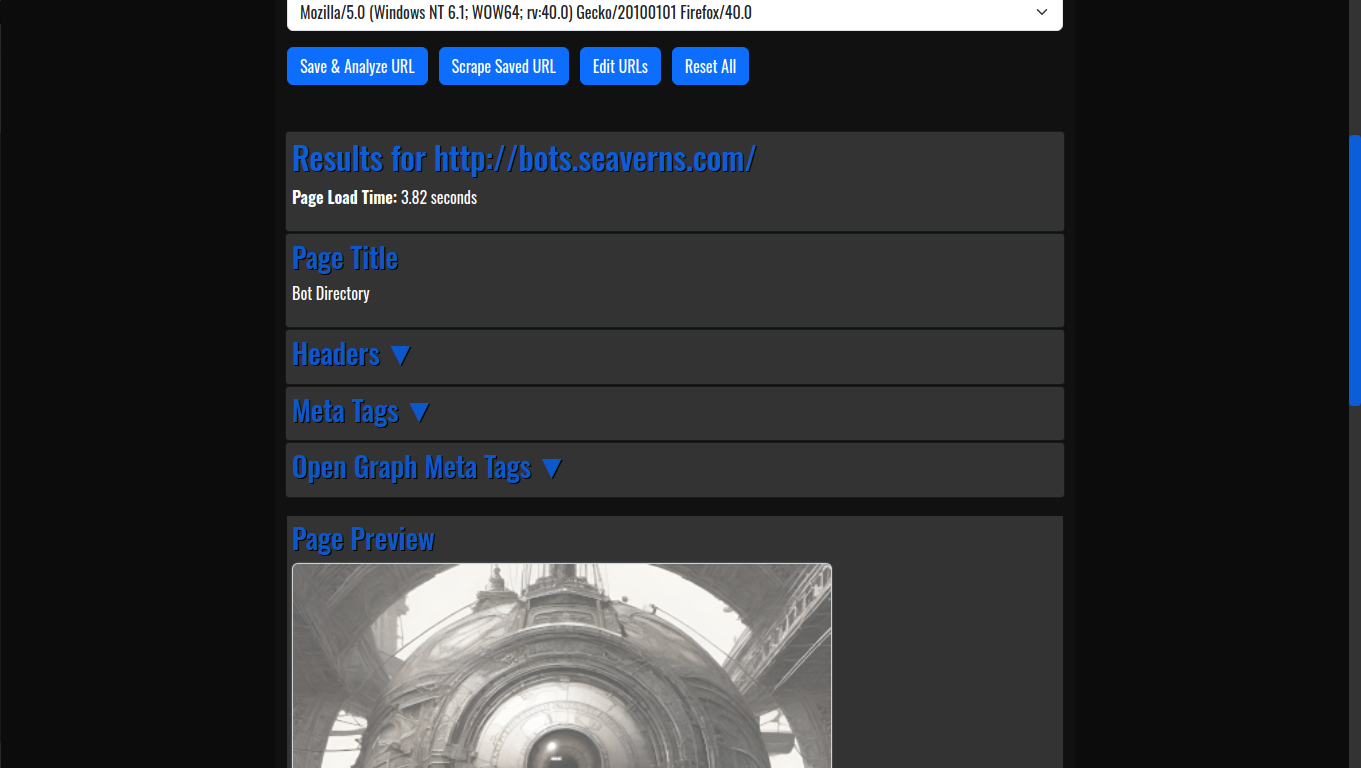
  1. Web Page Analysis:
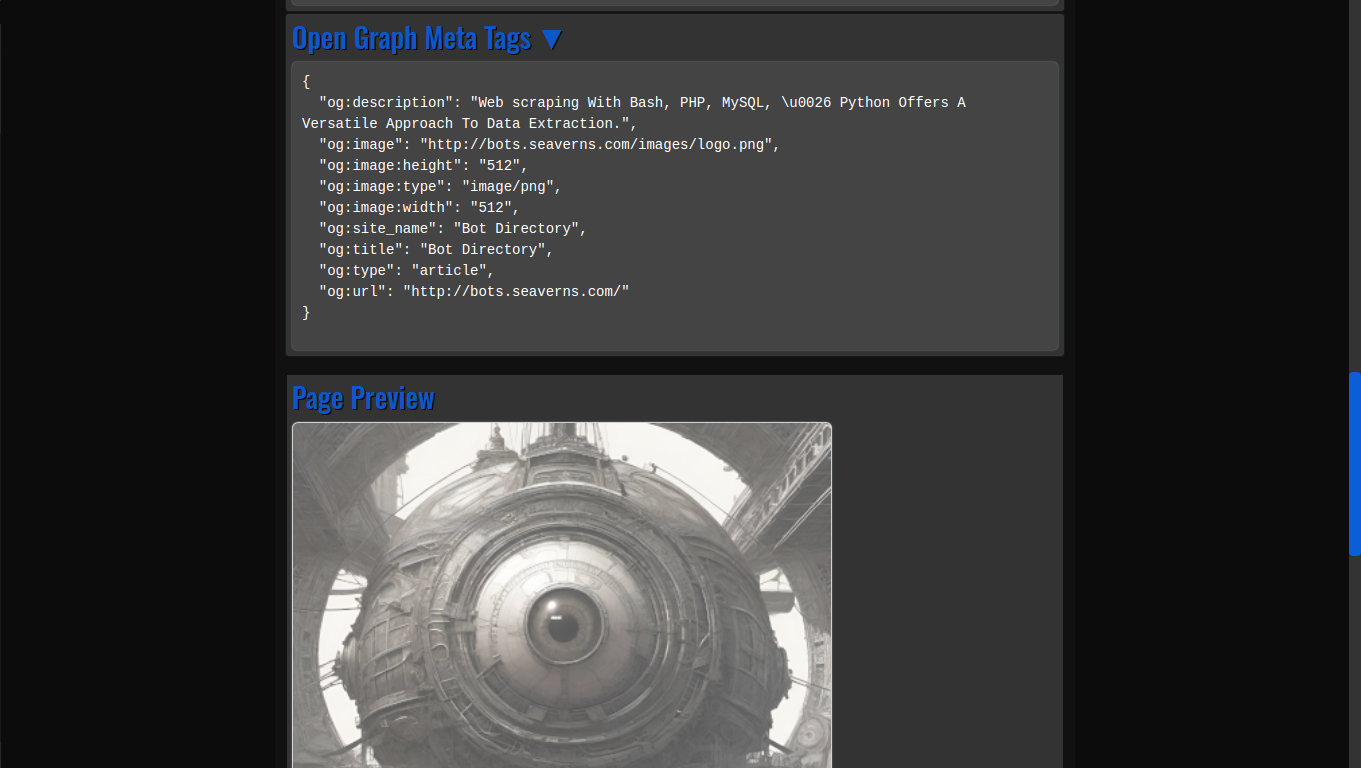
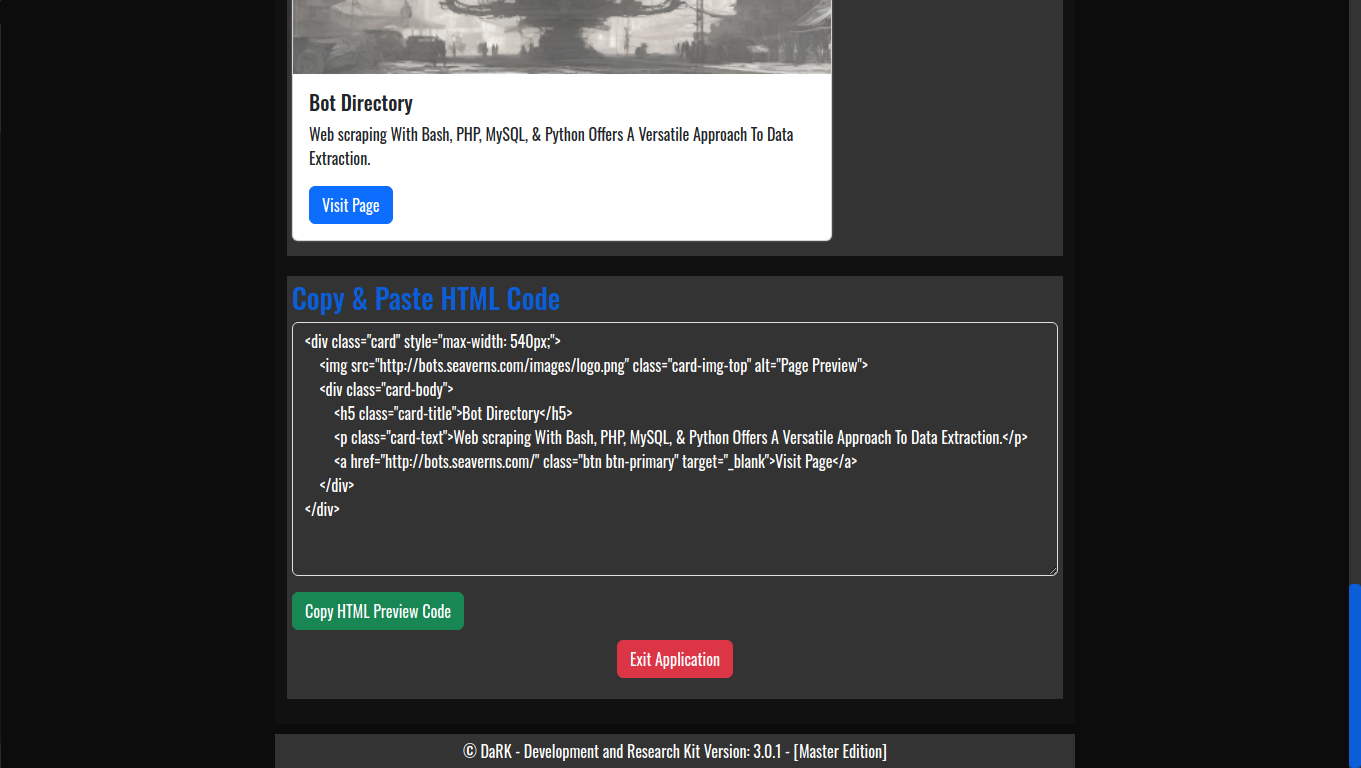
    • HTML Code Previews: The application allows developers to generate live HTML previews of web pages, enabling quick and efficient testing without needing to launch full web browsers or rely on external tools.
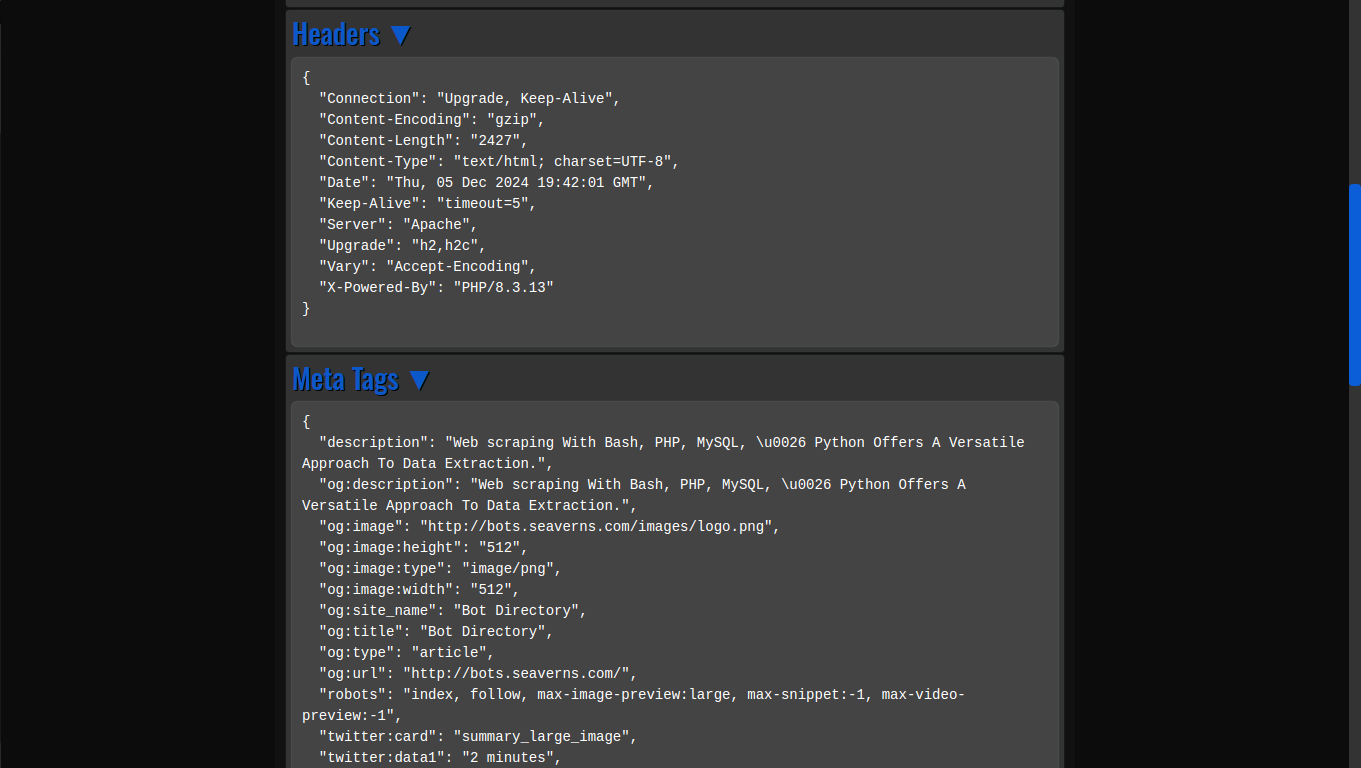
    • View Web Page Headers: By simply entering a URL, users can inspect the HTTP headers returned by the web server, offering insights into server configurations, response times, and more.
    • Og Meta Tags: Open Graph meta tags, which are crucial for social media previews, are extracted automatically from any URL, providing developers with valuable information about how a webpage will appear when shared on platforms like Facebook and Twitter.
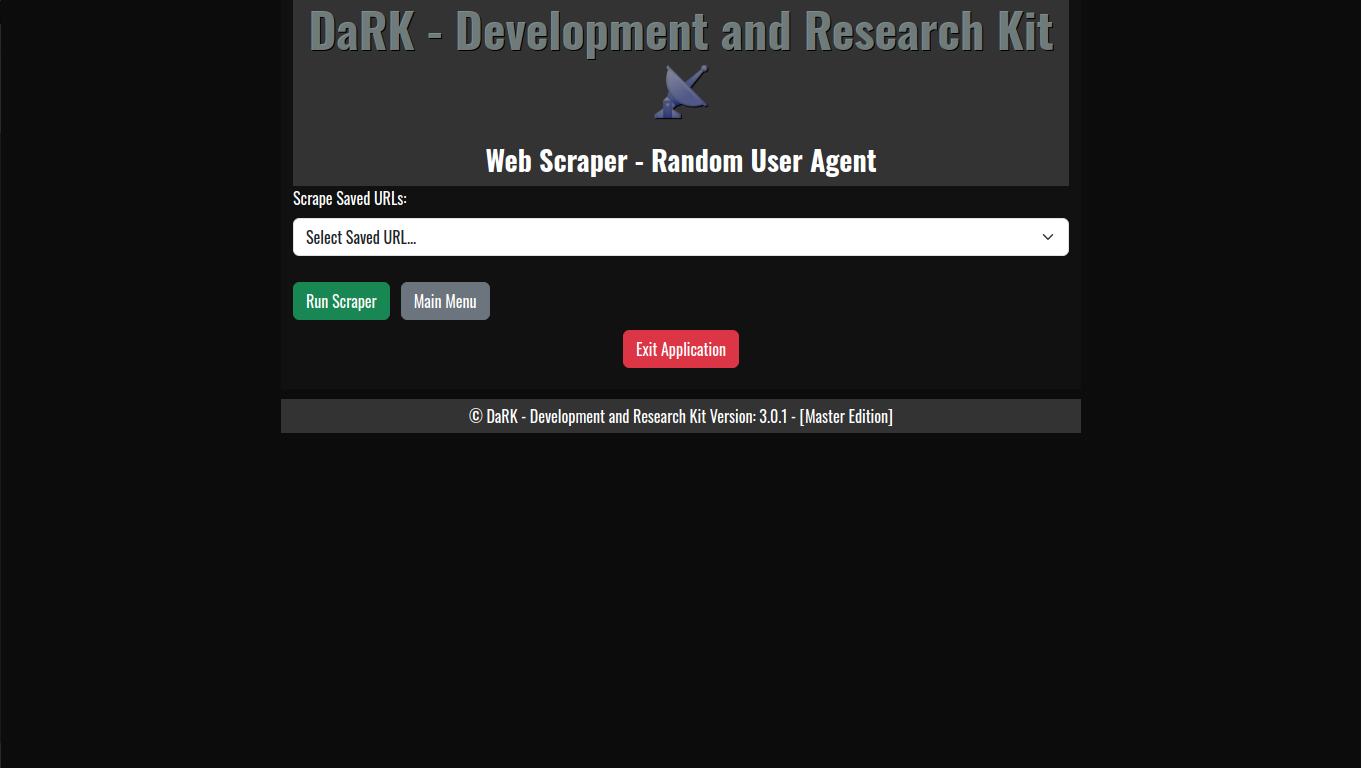
  2. Web Scraping Capabilities:
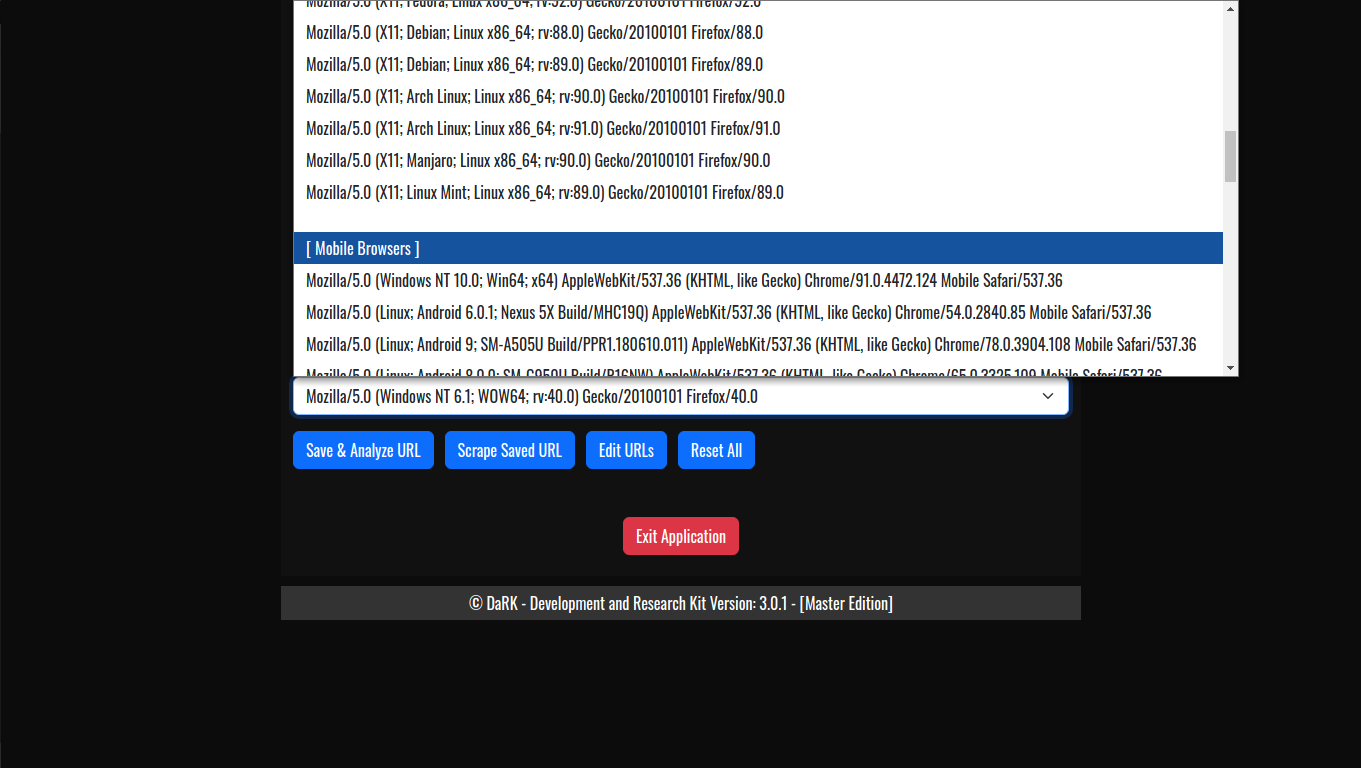
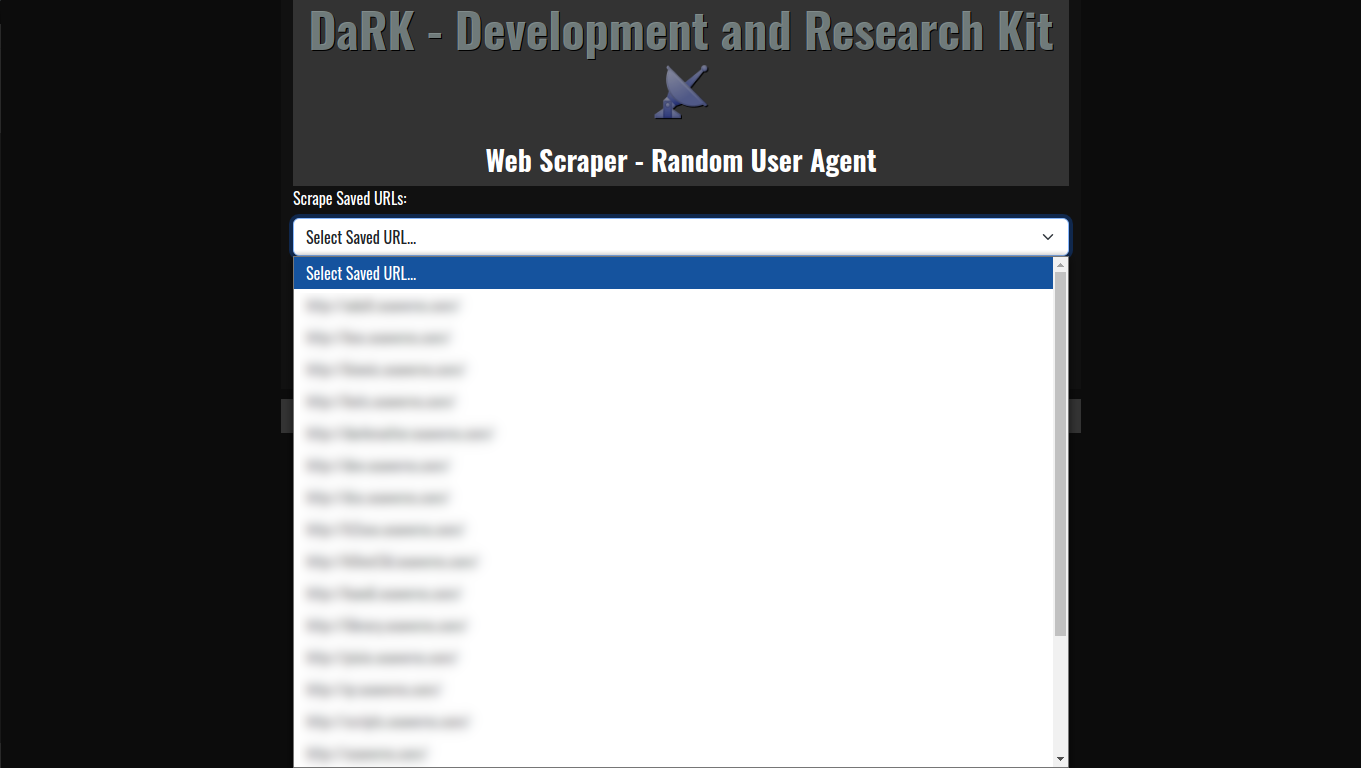
    • Random User-Agent Rotation: The application comes with an extensive list of over 60 user-agents, including popular browsers and bots. This allows for a varied and random selection of user-agent strings for each scraping session, helping to avoid detection and rate-limiting from websites.
    • Deep Scraping: The scraping engine is designed for in-depth content extraction. It is capable of downloading and extracting nearly every file on a website, such as images, JavaScript files, CSS, and documents, making it an essential tool for researchers, web developers, and penetration testers.
  3. Anonymity with Tor:
    • The app routes all HTTP/HTTPS requests through Tor, ensuring anonymity during web scraping and browsing. This is particularly beneficial for scraping data from sites that restrict access based on IP addresses or are behind geo-blocking mechanisms.
    • Tor Integration via torsocks: DaRK leverages the torsocks tool to ensure that all requests made by the application are anonymized, providing an extra layer of privacy for users.
  4. Browser Control:
    • Launch and Close Browser from HTML: Using the Chrome browser, DaRK can launch itself as a web-based application, opening a local instance of the tool’s user interface (UI) in the browser. Once finished, the app automatically closes the browser to conserve system resources, creating a seamless user experience.
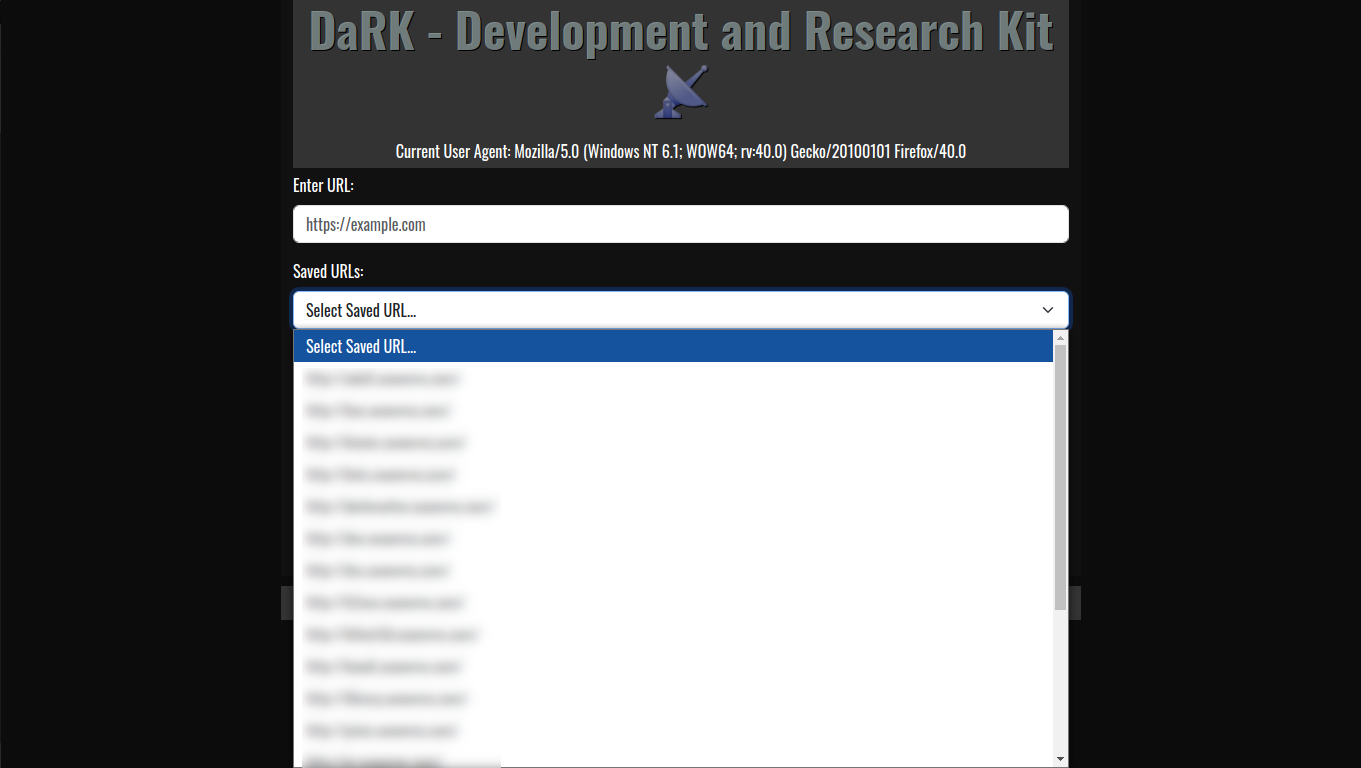
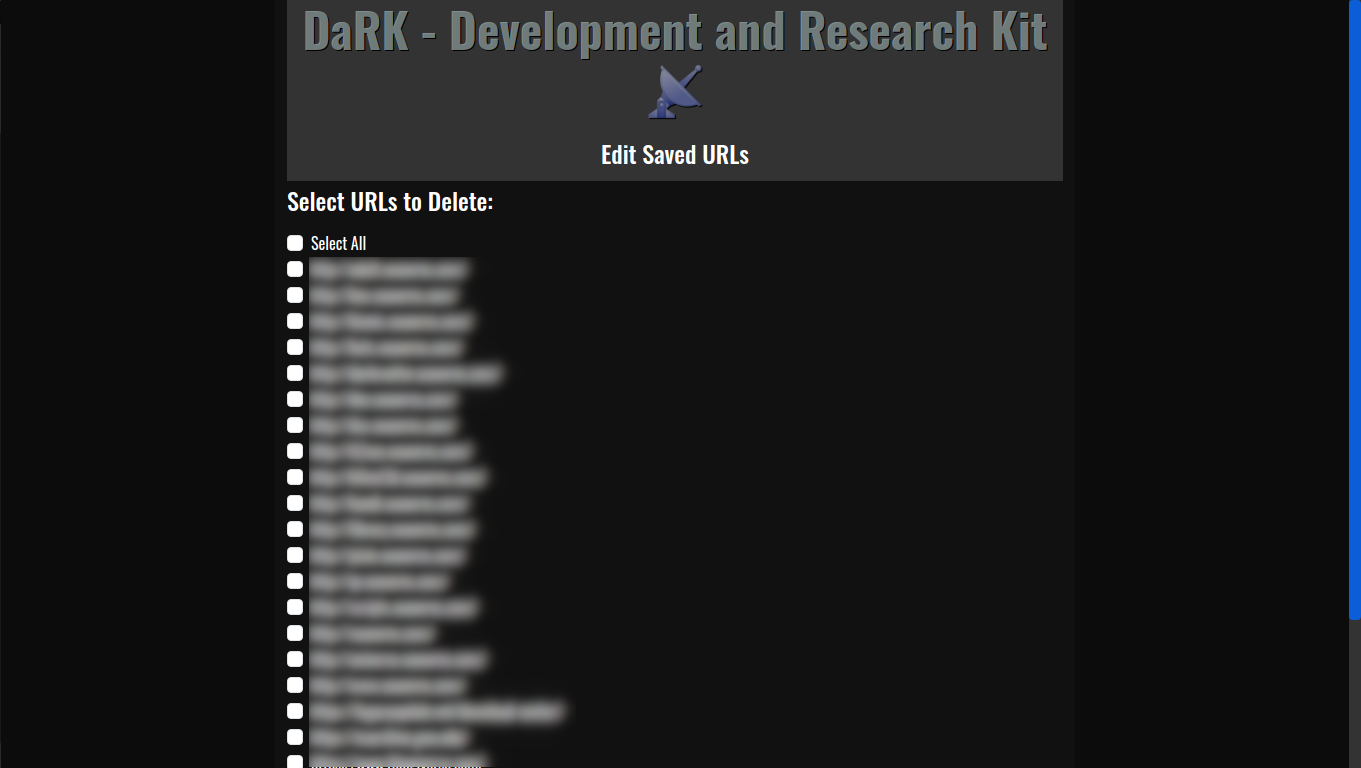
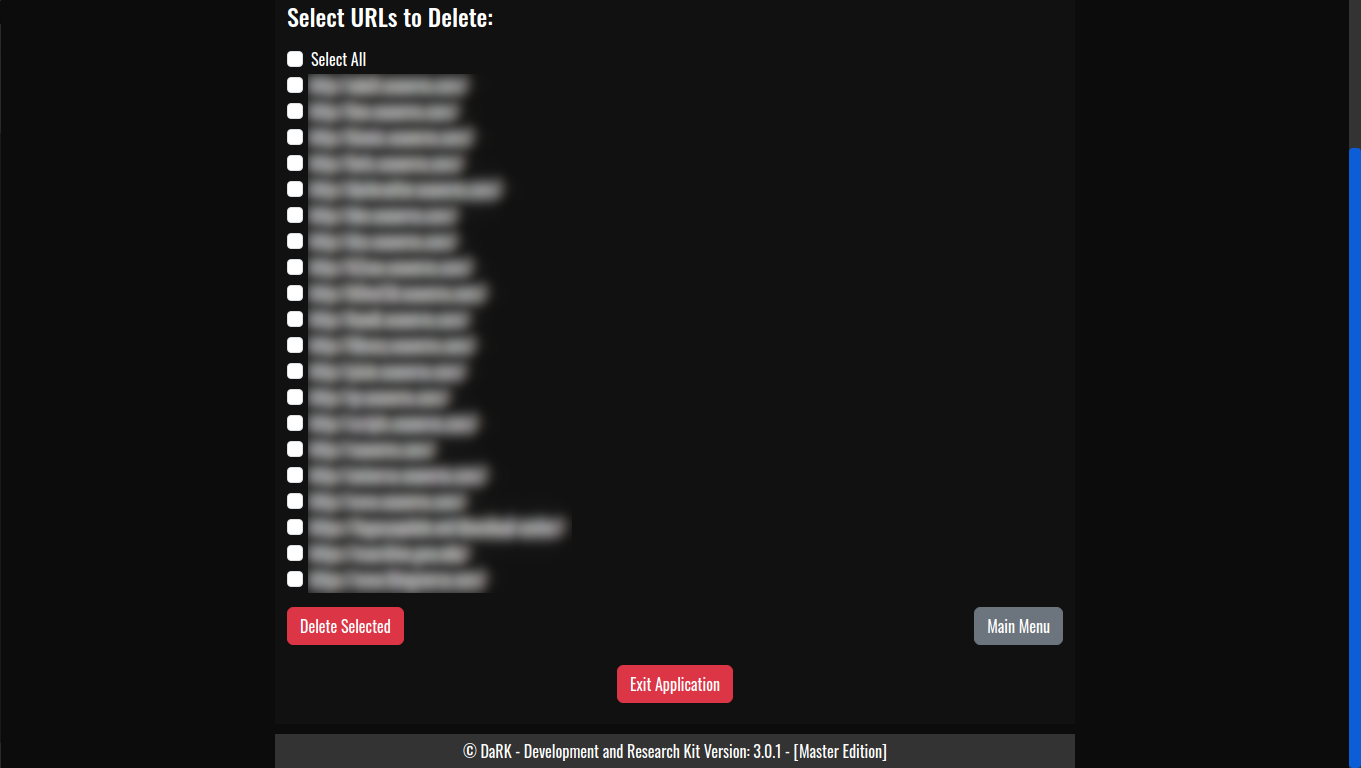
  5. SQLite Database for URL Storage:
    • Persistent Storage: The tool maintains a local SQLite database where URLs are stored, ensuring that web scraping results can be saved, revisited, and referenced later. The URLs are timestamped, making it easy to track when each site was last accessed.
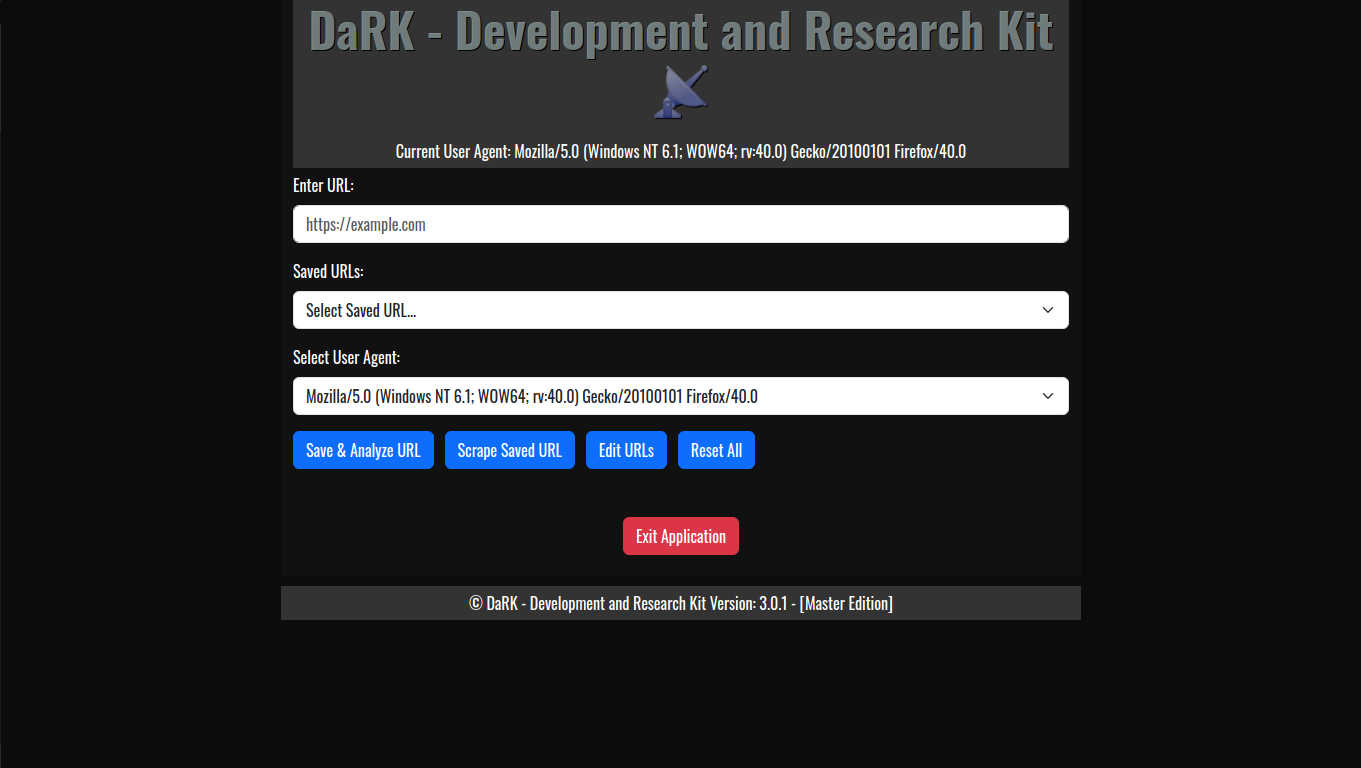
  6. Flask Web Interface:
    • The application includes a lightweight Flask web server that provides a user-friendly interface for interacting with the app. Users can input URLs, generate previews, and review scraped content all from within a web-based interface.
    • The Flask server runs locally on the user’s machine, ensuring all data stays private and secure.

DaRK Development and Research Kit 3.0 Core Components

  • Tor Integration: The get_tor_session() function configures the requests library to route all traffic through the Tor network using SOCKS5 proxies. This ensures that the user’s browsing and scraping activity remains anonymous.
  • Database Management: The initialize_db() function sets up an SQLite database to store URLs, and save_url() ensures that new URLs are added without duplication. This enables the tool to keep track of visited websites and their metadata.
  • Web Scraping: The scraping process utilizes BeautifulSoup to parse HTML content and extract relevant information from the web pages, such as Og meta tags and headers.
  • Multi-threading: The tool utilizes Python’s Thread and Timer modules to run operations concurrently. This helps in opening the browser while simultaneously executing other tasks, ensuring optimal performance.

Use Case Scenarios

  • Developers: DaRK simplifies the process of generating HTML previews and inspecting headers, making it a valuable tool for web development and testing.
  • Cybersecurity Professionals: The deep scraping feature, along with the random user-agent rotation and Tor integration, makes DaRK an ideal tool for penetration testing and gathering information on potentially malicious or hidden websites.
  • Researchers: DaRK is also an excellent tool for gathering large volumes of data from various websites anonymously, while also ensuring compliance with ethical scraping practices.

DaRK Development and Research Kit 3.0

DaRK – Development and Research Kit 3.0 [Master Edition] is a powerful and versatile tool for anyone needing to interact with the web at a deeper level. From generating HTML previews and inspecting web headers to performing advanced web scraping with enhanced privacy via Tor, DaRK offers an all-in-one solution. The application’s integration with over 60 user agents and its deep scraping capabilities ensure it is both effective and resilient against modern web security mechanisms. Whether you are a developer, researcher, or security professional, DaRK offers the tools you need to work with the web efficiently, securely, and anonymously.

Seaverns Web Development Coding Security Applications and Software Development Bex Severus Galleries Digital Art & Photography

Apache LAMP Install Script

Apache LAMP Install Script

Here’s a full Apache LAMP Install Script for setting up aa LAMP stack on Ubuntu (assuming Linux is excluded from the setup), including the installation and configuration of Apache, PHP, MySQL, and phpMyAdmin. The script also includes basic Apache configurations, enabling modules like mod_rewrite, and configuring phpMyAdmin with secure settings.

Full Apache LAMP Install Script
(for Ubuntu-based systems):


#!/bin/bash

# Update and upgrade the system
sudo apt update -y
sudo apt upgrade -y

# Add PPA for PHP and Apache
echo "Adding PPA repositories for PHP and Apache..."
sudo add-apt-repository ppa:ondrej/php -y
sudo add-apt-repository ppa:ondrej/apache2 -y
sudo apt update -y

# Install Apache2
echo "Installing Apache2..."
sudo apt install apache2 -y

# Install PHP and commonly used extensions
echo "Installing PHP and extensions..."
sudo apt install php libapache2-mod-php php-cli php-mysql php-curl php-gd php-xml php-mbstring php-zip php-soap -y

# Install MySQL Server and secure the installation
echo "Installing MySQL Server..."
sudo apt install mysql-server -y

# Run MySQL Secure Installation
echo "Securing MySQL installation..."
sudo mysql_secure_installation

# Install phpMyAdmin
echo "Installing phpMyAdmin..."
sudo apt install phpmyadmin php-mbstring php-zip php-gd php-json php-curl -y

# Link phpMyAdmin to Apache web directory
echo "Configuring phpMyAdmin..."
sudo ln -s /usr/share/phpmyadmin /var/www/html/phpmyadmin

# Set permissions for phpMyAdmin
echo "Setting permissions for phpMyAdmin..."
sudo chown -R www-data:www-data /usr/share/phpmyadmin
sudo chmod -R 755 /usr/share/phpmyadmin

# Enable Apache modules
echo "Enabling Apache modules..."
sudo a2enmod rewrite
sudo a2enmod headers
sudo a2enmod ssl

# Set up basic Apache configurations (security headers, etc.)
echo "Configuring Apache settings..."
echo '
<IfModule mod_headers.c>
Header always set X-Content-Type-Options "nosniff"
Header always set X-XSS-Protection "1; mode=block"
Header always set X-Frame-Options "SAMEORIGIN"
Header always set Referrer-Policy "no-referrer"
</IfModule>

<IfModule mod_rewrite.c>
RewriteEngine On
RewriteCond %{REQUEST_FILENAME} !-f
RewriteCond %{REQUEST_FILENAME} !-d
RewriteRule ^(.+)$ /index.php [QSA,L]
</IfModule>
' | sudo tee /etc/apache2/conf-available/security_headers.conf > /dev/null

# Enable custom security headers configuration
sudo a2enconf security_headers

# Enable and restart Apache and MySQL services
echo "Restarting Apache and MySQL..."
sudo systemctl restart apache2
sudo systemctl restart mysql

# Set MySQL to start on boot
echo "Ensuring MySQL starts on boot..."
sudo systemctl enable mysql

# Test Apache and MySQL installation
echo "Testing Apache and MySQL..."
sudo systemctl status apache2
sudo systemctl status mysql

# Configure phpMyAdmin with MySQL (Optional, run if needed)
echo "Configuring phpMyAdmin to work with MySQL..."
# Create a user for phpMyAdmin in MySQL
sudo mysql -u root -p -e "CREATE USER 'phpmyadmin'@'localhost' IDENTIFIED BY 'phpmyadminpassword';"
sudo mysql -u root -p -e "GRANT ALL PRIVILEGES ON *.* TO 'phpmyadmin'@'localhost' WITH GRANT OPTION; FLUSH PRIVILEGES;"

echo "LAMP stack installation complete!"


Breakdown of the Apache LAMP Install Script:

  1. System Updates:
    • Updates the package list and upgrades the system to ensure it is up-to-date.
  2. PPA for PHP and Apache:
    • Adds the PPA repositories for the latest PHP and Apache versions (ppa:ondrej/php and ppa:ondrej/apache2).
  3. Apache2 Installation:
    • Installs the Apache web server.
  4. PHP Installation:
    • Installs PHP along with some common PHP extensions (like MySQL, CURL, GD, MBString, XML, and SOAP).
  5. MySQL Installation and Security Setup:
    • Installs MySQL and runs the mysql_secure_installation script to secure the MySQL installation (you’ll need to set a root password and answer security questions).
  6. phpMyAdmin Installation:
    • Installs phpMyAdmin and relevant PHP extensions. It then configures it to be accessible via the Apache web server.
  7. Enabling Apache Modules:
    • Enables the mod_rewrite, mod_headers, and mod_ssl modules for security and functionality.
  8. Apache Basic Configuration:
    • Sets up HTTP security headers and enables the mod_rewrite rule to handle URL rewriting in Apache.
  9. Restart Services:
    • Restarts Apache and MySQL services to apply changes.
  10. Test:
    • Verifies that Apache and MySQL services are running properly.
  11. MySQL User for phpMyAdmin (Optional):
    • Creates a user for phpMyAdmin in MySQL with the necessary privileges. You can customize the password and user details.

Additional Notes:

  • MySQL Secure Installation: This script will invoke the mysql_secure_installation command during execution. You will be prompted to configure your MySQL root password and set other security options interactively.
  • phpMyAdmin: By default, phpMyAdmin will be accessible at http://your-server-ip/phpmyadmin after running this script. Make sure to adjust any security settings (e.g., .htaccess protection) for production environments.
  • Permissions: The script ensures that phpMyAdmin has proper file permissions to function correctly under the web server’s user (www-data).
Senya 1.0 Cross Domain WordPress Data Mining Utility

Сеня 1.0 (Senya 1.0)

Senya 1.0 Cross Domain WordPress Data Mining Utility

Сеня 1.0 – K0NxT3D 2024
Back End WordPress Utility

Features:

  • Edit WordPress Database.
  • Edit WordPress User Tables.
  • Edit WordPress User Information.
  • Display WordPress Domain and Associated Admin Email Addresses Across Multiple Domains.

A simple and easy to use PHP/HTML Based MySQL Back End Connection Utility with Editing Capabilities and Email Harvesting across Multiple Domains.

Download

Seaverns Web Development Coding Security Applications and Software Development Bex Severus Galleries Digital Art & Photography

Quick Nmap – Host Scanning With Nmap Made Easy

Quick Nmap Scanning Utility Framework

This script provides a basic framework for a quick and easy Nmap scanning utility. Designed for rapid security checkups, it leverages the Zenity tool to create a graphical user interface (GUI) that simplifies the process of running common Nmap scans. This script does not require sudo privileges, making it suitable for environments where elevated permissions are restricted. However, it does have a minor bug that affects user interaction with the script descriptions.

  • Options Array: Defines a list of common Nmap scan options, each associated with a descriptive label.
  • Zenity Dialogs:
    • The zenity --list command presents a GUI list for selecting Nmap options.
    • The zenity --entry command prompts the user to input a URL.
  • Command Execution:
    • Constructs the full Nmap command using the selected options and entered URL.
    • Uses eval to execute the constructed Nmap command.
    • Displays the command being executed using another Zenity dialog.

The Code:


#!/bin/bash
# Quick Nmap - K0NxT3D
# Here's The Framework For A Project I Put
# Together For Quick Response Security Checkups.
# BUGS: Clicking The Description Will Process As Command.
# Click The Actual Command In This Example & Then The URL.

# Function to display error message and exit
    show_error() {
    zenity --error --text="$1" --title="Error"
    exit 1
}

# Function to display Nmap options list and prompt for URL
    get_nmap_options() {
# List of Nmap options
    options=(
    "[Ping Remote Host]" " -p 22,113,139" \
    "[Quick scan]" " -F" \
    "[Intense scan, all TCP ports]" " -p 1-65535 -T4 -A -v" \
    "[Scan all TCP ports (SYN scan)]" " -p- -sS -T4 -A -v" \
    "[Scan UDP ports]" " -sU -p 1-65535" \
    "[Full Scan, OS Detection, Version]" " -A" \
    "[Scan All Ports On Host]" " -sT -n -p-" \
    "[Scan with default NSE Scripts]:" " -sC" \
    "[TCP SYN port scan]" " -sS" \
    "[UDP Port Scan]" " -sU" \
    "[Scan For HTTP Vulnerabilities]" " -Pn -sV -p80 --script=vulners" \
    "[Nmap Help]" " -h")

# Display list of options and prompt for selection
    selected_option=$(zenity --list --title="Quick Nmap - K0NxT3D" --column="Options" "${options[@]}" --height 500 --width 500 --text="Select Options:")
        [ -z "$selected_option" ] && show_error "No Option Selected."

# Prompt for URL
    url=$(zenity --entry --title="Enter URL" --text="Enter URL To Scan:")
        [ -z "$url" ] && show_error "URL Not Provided."

# Execute Nmap command
    nmap_command="nmap $selected_option $url"
    echo "Executing Command: $nmap_command"
    zenity --info --text="Executing Nmap command:\n$nmap_command"
    eval "$nmap_command"
}

# Display GUI for Nmap options and URL input
get_nmap_options

Bug Description

  • Description Bug: The script’s current implementation has a bug where clicking on a description in the Zenity list triggers an attempt to run the description as a command first. This results in an error message being displayed before the actual Nmap command is executed. While this does not significantly affect the performance or functionality of the script, it is noted as a minor inconvenience.

Advanced Usage

  • Enhanced Functionality: Users who are familiar with Nmap can modify and extend this framework to include additional scanning options or integrate more advanced features.
  • Proxy and Anonymity: The script is compatible with tools like torsocks and proxychains for executing Nmap scans through proxies, enhancing privacy and bypassing geographical restrictions.

This script serves as a convenient starting point for running common Nmap scans with a user-friendly interface, while also allowing for customization and enhancement based on individual needs.

Seaverns Web Development Coding Security Applications and Software Development Bex Severus Galleries Digital Art & Photography

Apache Security Update Jammy Apache2 Php Linux Ubuntu/Raspberry Pi x64 | x32 RPI 3 – 4

Apache Security Update Jammy Apache2 Php Linux Ubuntu/Raspberry Pi x64 | x32 RPI 3 – 4

I certainly get a lot of attacks and nothing is ever really “Secure”.
That being said, there are some serious vulnerabilities running around, you might want to do some updating to your Apache Servers and Php.
After a recent batch of installs, I was able to exploit both Apache2 and Php pretty easily, so this will be common.

To test for the recent list of vulnerabilities and open exploits on Your Own Machines, you can run:

nmap -Pn -sV -p80 --script=vulners -oN output.txt 127.0.0.1

If you’re running several hosts:
nmap -Pn -sV -p80 –script=vulners -oN output.txt 192.168.1.0/24
This will scan your local network for any vulnerable hosts and sure enough, the new upgrades had some issues.

The Fix:

Linux Ubuntu (x64):

sudo add-apt-repository ppa:ondrej/apache2
sudo add-apt-repository ppa:ondrej/php

sudo apt update -y
sudo apt upgrade -y

This will work in just about every case – Except with the RPI3 Series.
This one’s a little longer, but it works and you can thank me later.

RPI 3B+ (x32/Jammy)

sudo apt-get install software-properties-common

Just In Case..

Apply Fix:

curl https://packages.sury.org/php/apt.gpg | sudo tee /usr/share/keyrings/suryphp-archive-keyring.gpg >/dev/null

echo "deb [signed-by=/usr/share/keyrings/suryphp-archive-keyring.gpg] https://packages.sury.org/php/ $(lsb_release -cs) main" | sudo tee /etc/apt/sources.list.d/sury-php.list

curl https://packages.sury.org/apache2/apt.gpg | sudo tee /usr/share/keyrings/suryapache2-archive-keyring.gpg >/dev/null

echo "deb [signed-by=/usr/share/keyrings/suryapache2-archive-keyring.gpg] https://packages.sury.org/apache2/ $(lsb_release -cs) main" | sudo tee /etc/apt/sources.list.d/sury-apache2.list

sudo apt update -y
sudo apt upgrade -y

sudo systemctl restart apache2

Resources:
Sury.ORG (Highly Recommended)
https://sury.org/

NMap: (Do You Even Web?)
https://nmap.org/


The Omniverse Library – Knowledge For Life Volume I

Knowledge For Life Volume I

The Omniverse Library:
A diverse reading list from several topics.
The Omniverse Library boasts an extensive collection of resources covering a wide range of subjects, including science, history, philosophy, and the occult. Users can access a plethora of articles, books, research papers, manuscripts, and multimedia content curated from reputable sources worldwide.

Continuous Enrichment: The Omniverse Library is a dynamic platform continually enriched with new additions and updates. With regular contributions from experts, scholars, and content creators, the library remains a vital source of knowledge, fostering intellectual growth and exploration in an ever-evolving world.

Join the Quest for Knowledge: Embark on a journey of discovery and enlightenment with The Omniverse Library—an unparalleled digital repository where the boundaries of human understanding are transcended, and the pursuit of truth knows no bounds.

American & World HistorySciencePhilosophyThe OccultSurvival & Of Course.. some Miscreant Materials.
Carl SaganIsaac NewtonNikola TeslaSun TzuAleister CrowleyKarl MarxAnarchist CookbookBushcraft


https://wordpress.org/download/

DarkMatter Display Random Quotes Plugin For WordPress

The DarkMatter Display Random Quotes Plugin For WordPress is a very simple and straight forward plugin that posts random quotes to the bottom of WordPress Posts.
You can edit the quotes.txt (plugins/quote-of-the-day/quotes.txt) file to add or remove your own.
You can see it running below this post.

Download: DarkMatter – Quote Of The Day WordPress Plugin

PhP Header Request Spoofing Ip Address User Agent Geo-Location

Generate Random HTTP Request

Random HTTP Request Generator – “generator.php”

This generates the Header Request Information to be sent to a Destination URL.
For Testing Purposes Only – Some Files Have Been Excluded.
The Destination URL tracks incoming HTTP Requests and filters them for “bad data” or
“Spoofed Requests” such as the requests generated here.

Server Status Monitor PhP Code

PhP Monitor Active and Inactive Servers

This is a simple and no frills way to monitor your servers.
You will need to create the file “urls.txt” in the same folder as the “active-servers.php” file.

Examples – urls.txt:
https://www.my-website.com/
http://localhost/
http://www.my-website.com/some/page.php

Navigate to the active-servers.php file. ( http://www.your-site.com/scripts/active-servers.php)
Online Servers will be Lime and Offline Servers, Red.

active-servers.php

<head>
<title>Active Servers</title>
</head>
<body style=”background-color: #0c0c0c;”>
<div>
<table width=”100%” height=”100%”>
<tr>
<td>
<table style=”margin-bottom: 100%;text-transform: uppercase;”>
<?php
$fn = fopen(“urls.txt”,”r”);
while(! feof($fn)) {
$result = fgets($fn);
$server=gethostbyname(parse_url($result, PHP_URL_HOST));
if (fsockopen($server, 80)){
echo (‘ <tr><td><b><a style=”color: Lime; text-decoration: none;”href=”‘.$result.'” target=”viewer”>’.$result.'</b></td></tr>’. “\r\n”);
} else
{
echo (‘ <tr><td style=”color: #a00000″>’.$result.'</td></tr>’. “\r\n”);
}

} fclose($fn); ?>

</table>
</td>
<td width=”100%”><iframe align=”right” class=”viewpanel” src=”” name=”viewer” frameborder=”0″ width=”100%” height=”600px”></iframe></td>
</tr>
</table>
</div>
</body>

Spoofing Random Toys MySql WordPress Form Data Fields

Fake Email Generator Create Random Email Addresses From Files

This is just a fun little toy that happened while working on MySQL Automation.
The files used are first_names.txt, last_names.txt and domains.txt.
Reading random lines from the files in order creates the “Fake Email Address” and using [array_rand($variable)]; each email address is somewhat unique as I’m only using 80,000 names (give or take a few hundred).

All Files: fake-email-generator.zip


#!/bin/bash
$first_names = 'first_names.txt';
$last_names = 'last_names.txt';
$dom = 'domains.txt';

    $firstname = file($first_names);
    $fdata = $firstname[array_rand($firstname)];
    $first = $fdata;

        $lastname = file($last_names);
        $ldata = $lastname[array_rand($lastname)];
        $last = $ldata;

    $comd = file($dom);
    $edata = $comd[array_rand($comd)];
    $com = $edata;

        $first = preg_replace('/\s+/', '', $first);
        $first = strtolower($first);
        $last = preg_replace('/\s+/', '', $last);
        $last = strtolower($last);
        $com = preg_replace('/\s+/', '', $com);

    echo $first."@".$last.$com;]