HEXT — Text to ASCII Banner Generator

HEXT 2.0 Text to ASCII Banner Generator

HEXT 2.0 Text to ASCII Banner Generator

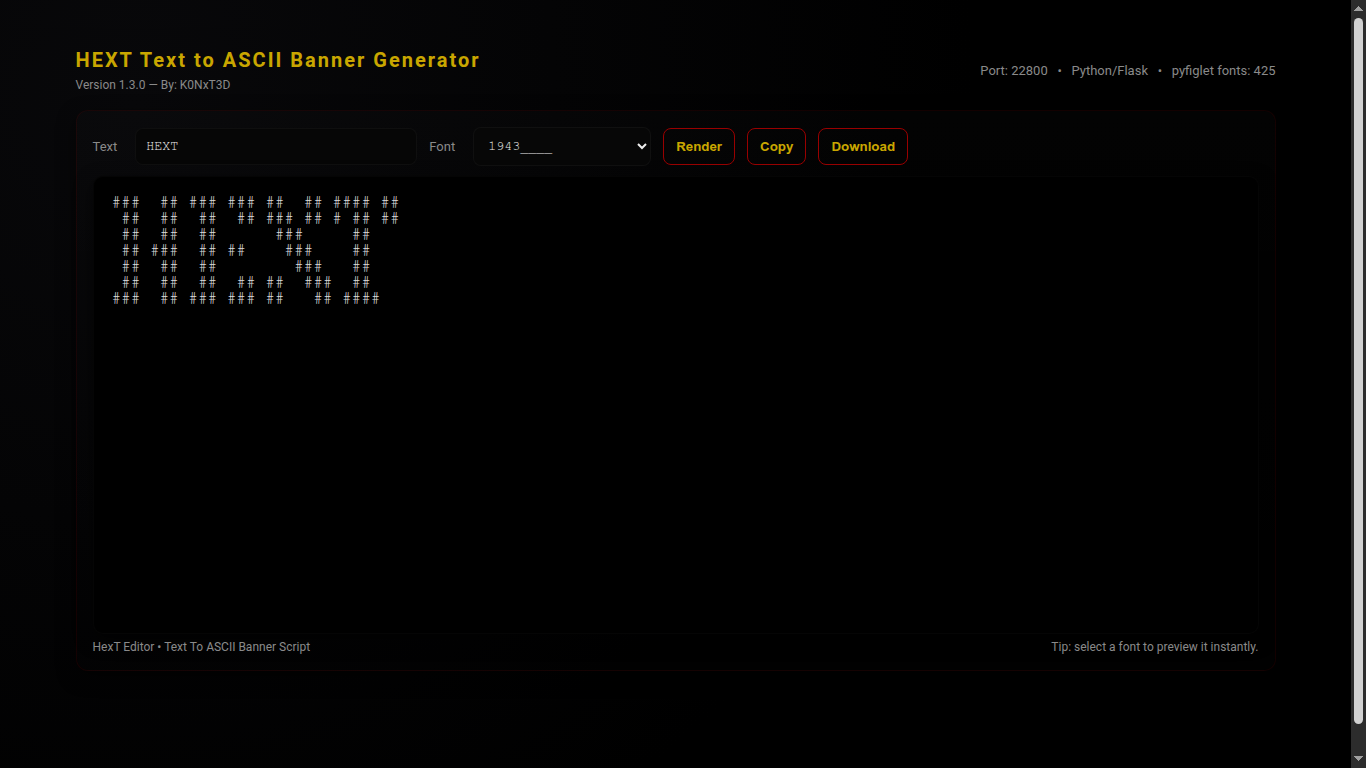
HEXT 2.0 Text to ASCII Banner Generator is a Python3 web application that converts text into ASCII banners using pyfiglet.
It features a modern, dark aesthetic interface with live font selection, copy and download functionality, and full-screen previews.

Version Information

Version: 2.0
Author: K0NxT3D
Website: seaverns.com

Download

Core Features

🖋 Text to ASCII

  • Render text using any installed pyfiglet font
  • Live preview with instant updates
  • Copy to clipboard or download as .txt

🎨 Font Selection

  • Dropdown menu for all available pyfiglet fonts
  • Sidebar font reference panel
  • Dynamic highlighting of selected font

💻 Web Interface

  • Dark hacker aesthetic layout
  • Responsive design for desktop and mobile
  • Clean two-column layout with sidebar

Requirements

  • Python 3.12+ (tested on Ubuntu 24 & Raspberry Pi)
  • pip3 installed

Python Packages

  • Flask ≥ 2.3.2
  • pyfiglet ≥ 0.8.post1

Installation

cd HEXT

python3 -m venv venv
source venv/bin/activate

pip install -r requirements.txt
python3 hext.py

Usage

1) Launch Application

python3 hext.py

2) Open in Browser

http://127.0.0.1:22800/

3) Enter Text & Render

- Type text into the input field
- Select a font from the dropdown
- Click "Render"

4) Copy / Download

- Click "Copy" to clipboard
- Click "Download" to save .txt file

License

MIT License

Copyright (c) 2025 Rob Seaverns

Permission is hereby granted, free of charge, to any person obtaining a copy
of this software and associated documentation files (the “Software”), to deal
in the Software without restriction, including without limitation the rights  
to use, copy, modify, merge, publish, distribute, sublicense, and/or sell  
copies of the Software, and to permit persons to whom the Software is  
furnished to do so, subject to the following conditions:

The above copyright notice and this permission notice shall be included in  
all copies or substantial portions of the Software.

THE SOFTWARE IS PROVIDED “AS IS”, WITHOUT WARRANTY OF ANY KIND, EXPRESS OR  
IMPLIED, INCLUDING BUT NOT LIMITED TO THE WARRANTIES OF MERCHANTABILITY,  
FITNESS FOR A PARTICULAR PURPOSE AND NONINFRINGEMENT. IN NO EVENT SHALL THE  
AUTHORS OR COPYRIGHT HOLDERS BE LIABLE FOR ANY CLAIM, DAMAGES OR OTHER  
LIABILITY, WHETHER IN AN ACTION OF CONTRACT, TORT OR OTHERWISE, ARISING  
FROM, OUT OF OR IN CONNECTION WITH THE SOFTWARE OR THE USE OR OTHER  
DEALINGS IN THE SOFTWARE.
Web and Software Development

VoidCrawler Directory Browsing Utility

Looking for a fast, lightweight solution to browse and manage project directories? VoidCrawler Directory Browsing Utility is a single-file PHP application designed specifically for developers who want an offline, portable, and secure way to explore their project files.

VoidCrawler is built to run on any modern web server, including Apache, Nginx, or IIS, with PHP 7.4+. It leverages the browser’s FileReader API and drag-and-drop capabilities to provide instant directory tree rendering and file previews, all processed locally on your machine. This ensures complete privacy for sensitive repositories or personal projects.

VoidCrawler Directory Browsing Utility :

Before using the VoidCrawler Directory Browsing Utility, make sure your environment meets the following requirements. VoidCrawler is a PHP-based developer tool, so it needs a proper web server and modern browser capabilities to function correctly.

Web Server

VoidCrawler must run on a web server such as:

  • Apache – widely used and highly compatible

  • Nginx – lightweight and fast

  • IIS – for Windows environments

PHP

Since voidcrawler.php is a PHP file, your server must have PHP installed:

  • Recommended version: PHP 7.4+

  • Ensure the fileinfo PHP extension is enabled for optimal file handling

Browser

VoidCrawler uses modern browser APIs for instant directory browsing. Make sure you are using a supported browser:

  • FileReader API – required for reading local files

  • Drag-and-drop folder parsing (webkitdirectory) – for folder uploads

  • Compatible browsers include Chrome, Firefox, Edge, and Safari

⚠️ Important: VoidCrawler will not function properly without a web server and PHP. Opening the PHP file directly in a browser without a server may result in blank pages or errors.

By ensuring these prerequisites, you can fully leverage the VoidCrawler Directory Browsing Utility for offline, secure, and efficient file and directory management.

The application is extremely simple to set up. You only need the voidcrawler.php file and, optionally, a favicon.ico for branding. No installation, no dependencies, and no backend configuration are required. Just upload the file to your server, open it in a modern browser like Chrome, Firefox, Edge, or Safari, and start browsing your directories immediately.

VoidCrawler Directory Browsing Utility :

  • Instant directory-tree rendering with collapsible subfolders

  • Direct file previews without uploading or transmitting data

  • Single-file deployment for maximum portability

  • Dark, developer-friendly interface with clean, organized design

  • Customizable and hackable for developer workflows

  • Private offline repository browsing with hidden file/exclusion rules

Whether you are performing a code review, exploring documentation, or managing offline project files, VoidCrawler provides a convenient and secure solution for developers who value simplicity and speed.

For more information, updates, and downloads, visit K0NxT3D. VoidCrawler continues to evolve with new features, keeping developer productivity and privacy at the forefront.

Experience an effortless, drag-and-drop directory browsing experience today with the VoidCrawler Directory Browsing Utility, your portable developer CMS for all projects.

Latest Version 2.0.1 (Release)

Seaverns Web Development Coding Security Applications and Software Development Bex Severus Galleries Digital Art & Photography

VoidCrawler File Reconnaissance 2.0.1

VoidCrawler

Directory Reconnaissance System — Version 2.1.0 · K0NxT3D

VoidCrawler File Reconnaissanceis 2.0.1 is a DaRK-themed, tactical directory intelligence system built for precision, stealth, and control.
It recursively scans a base folder, renders a collapsible directory tree, and exposes direct-download links while filtering common web-app clutter.
VoidCrawler works exceptionally well with many DaRK Utilities.

Overview

VoidCrawler is designed as a reconnaissance tool rather than a general-purpose file manager. It strips noise, surfaces operational files, and presents a minimal, militarized UI ideal for server ops, forensic mapping, and admin dashboards.

Key Capabilities

  • Recursive directory mapping with natural sort
  • Collapsible folder UI (Bootstrap-powered)
  • Dedicated top-level “Direct Downloads” console
  • Filters out .htaccess*.php*.html*.db*.png
  • Pure PHP — no heavy frameworks required

History

VoidCrawler was not built to politely index.
It was not built to tag, catalog, or maintain compliance.
VoidCrawler was designed to invade.
To descend into dark directories.
To crawl the void between folders where broken paths hitchhike and dead files linger.

Installation

  1. Create a folder on your server for VoidCrawler (example: /var/www/html/voidcrawler).
  2. Drop the VoidCrawler PHP file (index.php) into that folder.
  3. Ensure the webserver user has read permissions: chmod -R 755 /var/www/html/voidcrawler
  4. Open the folder in a browser: https://yourdomain.com/voidcrawler/
Note: VoidCrawler reads directories only. It performs no writes, no command execution, and makes no remote API calls.

Quick Usage

The script scans from the directory it lives in by default. To change start path, edit the $root variable in the PHP file.

// default in index.php
$root = './';
$pathLen = strlen($root);
myScanDir($root, 0, strlen($root));

To scan elsewhere:

$root = '/var/www/data/archives/';

How It Works

At its core, VoidCrawler uses a recursive function to enumerate entries, separate directories and allowed files, sort them naturally, and render them into two main UI blocks:

  • Directories: a collapsible list on the left
  • Direct Downloads: top-level file console for quick retrieval

Core recursive logic (excerpt)

function myScanDir($dir, $level, $rootLen)
{
    global $pathLen;

    if ($handle = opendir($dir)) {
        $allFiles = [];

        while (false !== ($entry = readdir($handle))) {
            if ($entry != "." && $entry != ".." && $entry != ".htaccess") {
                if (is_dir($dir . "/" . $entry)) {
                    $allFiles[] = "D: " . $dir . "/" . $entry;
                } else if (!in_array(strtolower(pathinfo($entry, PATHINFO_EXTENSION)), ['php', 'html', 'db', 'png'])) {
                    $allFiles[] = "F: " . $dir . "/" . $entry;
                }
            }
        }

        closedir($handle);
        natsort($allFiles);

        // ...output folders and files with collapse UI...
    }
}

Configuration

Excluded Extensions

Default filter list (edit in the script):

['php', 'html', 'db', 'png']

Path

Set the scanning root in the PHP file. Use absolute paths when moving outside webroot. Example:

$root = '/var/www/html/wp-content/uploads/';

Security & Deployment Notes

  • Do not expose VoidCrawler on a public route without authentication — it reveals directory structure.
  • Restrict access via server auth or IP filtering when running in production.
  • Use absolute paths to limit scan scope.

Changelog

  • 2.1.0 — Branding overhaul, UI polish, DaRK theme applied.
  • 2.0.x — Core scanning functions hardened (EvilMapper lineage).

License

MIT License (use, modify, distribute). Attribution appreciated when used in public-facing tools.

Copyright (c) 2025 K0NxT3D

Permission is hereby granted, free of charge, to any person obtaining a copy
of this software and associated documentation files (the "VoidCrawler"), to deal
in the VoidCrawler without restriction, including without limitation the rights
to use, copy, modify, merge, publish, distribute, sublicense, and/or sell copies
of the VoidCrawler, and to permit persons to whom the VoidCrawler is furnished
to do so, subject to the following conditions:

The above copyright notice and this permission notice shall be included in all
copies or substantial portions of the VoidCrawler.
Web and Software Development

Torque HTTP Vulnerability Scanner

Torque Scanner

Torque Scanner is a cross‑platform network reconnaissance and audit tool designed to perform repeated HTTP requests with randomized user agent rotation, timing jitter, and optional Tor routing. It provides real‑time feedback through a web‑based control panel which automatically launches in your default browser.

Download Bundle

1. Launching the Application

Run the binary appropriate for your system:

./torque-scanner      (Linux / macOS)
torque-scanner.exe    (Windows)
  

On launch, Torque Scanner starts a small local web server and attempts to open your browser automatically. If it does not open, the terminal will display the URL:

http://127.0.0.1:xxxxx/
  

Copy this into your browser manually.

2. The Control Panel Interface

Once opened, you will see the main interface containing:

  • Target URL – The website or endpoint to be scanned.
  • Request Count – Total number of HTTP GET requests to send.
  • Concurrency – Number of workers (threads).
  • Jitter Settings – Random timing delays between requests.
  • Retry & Backoff Settings – Controls how failed requests are repeated.
  • Tor Settings:
    • Use Tor – Routes traffic through a SOCKS5 Tor proxy at 127.0.0.1:9050.
    • Tor NEWNYM – Requests a new Tor identity between requests (requires the Tor control port at 127.0.0.1:9051).
  • Real‑time Output Panel – Displays live request logs via SSE.

3. Starting a Scan

Enter your target URL (e.g., http://example.com). Set your preferred options and click:

INITIATE ATTACK PROBE
  

You will see each request logged in real time, including:

  • Worker ID
  • HTTP status codes
  • User‑Agent string selected
  • Tor routing notes
  • Retry attempts and backoff delays

4. Stopping a Scan

CEASE ATTACK PROBE
  

Workers will complete any in‑progress request and halt gracefully.

5. Tor Status Indicator

At the top of the UI, Torque Scanner displays:

  • SOCKS5 availability (port 9050)
  • Control port availability (port 9051)

These indicators update every 3 seconds.

6. Log Files

All scans are logged into:

./logs/tor_scanner_YYYYMMDD_HHMMSS.log
  

These logs can be used for security audits, debugging, and evidence collection.


Technical Overview & Internal Architecture

1. Overview

Torque Scanner is a concurrency‑driven network interrogation tool designed to evaluate:

  • Endpoint rate limiting
  • User‑agent filtering behavior
  • Load balancing characteristics
  • Tor behavior (through different identities)
  • Error handling and response reliability
  • Infrastructure resiliency under controlled request bursts

It is not a stress‑testing tool. Its purpose is security auditing and behavioral analysis, not overwhelming a service.

2. Architecture Summary

The software is built as a single Go program embedding both an HTTP server and a full web interface.

A. Web UI Server

  • Serves the embedded HTML GUI.
  • Provides:
    • /start – Begins a scan.
    • /stop – Halts a scan.
    • /events – SSE endpoint for live logs.

B. Worker Engine

  • A configurable number of goroutines pull jobs from a channel.
  • Each job represents a single HTTP GET request.
  • Workers:
    • Randomize a user agent
    • Sleep for jitter delay
    • Attempt request with retry & exponential backoff
    • Broadcast results via SSE

C. User Agent Management

  • Loads user-agents.txt if found.
  • Otherwise uses a compact built‑in list.
  • Random selection per request.

D. Tor Integration

Torque Scanner can direct all traffic through:

socks5://127.0.0.1:9050
  

Workers may optionally trigger a NEWNYM request on the control port, forcing a new Tor exit node identity.

E. Real‑Time Logs (SSE)

All activity is broadcast through Server‑Sent Events:

  • Low latency
  • Auto‑reconnecting
  • Live streaming to all connected browsers

F. Logging Subsystem

Every request is logged to file with:

  • Timestamp
  • Target
  • Worker ID
  • Status code
  • User agent
  • Retry attempts
  • Tor usage notes

3. Why Torque Scanner Is Useful

  • Web Security Testing
  • Tor privacy analysis
  • Endpoint reliability testing
  • Infrastructure diagnostics
  • Educational & research purposes

4. Cross‑Platform Support

  • Linux (x86_64, ARM, ARM64)
  • Windows
  • macOS
  • Raspberry Pi (ARM)

5. Ethical Usage

Torque Scanner is intended for:

  • Your own systems
  • Systems you have permission to test
  • Security auditing and research

Do not use it on systems where you lack authorization.

K0NxT3D

Web and Software Development

Reever Audio Reversal Utility

Reever Audio Reversal Utility

What Is Reever?

Reever  Audio Reversal Utility is a lightweight, experimental audio tool that lets musicians, sound designers, and curious creators instantly reverse any audio file. Perfect for eerie textures, reversed vocals, ambient FX, and creative sound design.


How It Works

  • Built with Tkinter for the GUI
  • Uses FFmpeg to process audio
  • Minimal two-button interface: “Browse” + “Reverse Audio”

Reever automatically outputs:

[filename]_reversed.[ext]


How to Use

1. Launch the App

Run ./reever Linux.

Run reever.exe Windows.

2. Choose Your Audio File

Click Browse and pick your audio file.

3. Reverse It

Click Reverse Audio. Reever handles the FFmpeg process for you.

4. Done

Your reversed audio file appears next to the original.


FFmpeg Command Used

ffmpeg -i inputfile -filter_complex areverse outputfile

Notes

  • FFmpeg must be installed and added to system PATH.
  • Supports all FFmpeg-compatible audio formats.
  • Designed for fun, experimentation, and creative discovery.

K0NxT3D

Use Reever Audio Reversal Utility to explore unusual soundscapes, reverse vocal lines, and create unique audio art.

Downloads:
Windows
Linux

Web And Software Development Coding Scripting Branding Images Media Content Management Systems

QMap Concurrent Nmap Frontend

QMap Nmap Frontend

Simple, step-by-step instructions for QMap Nmap end users. What you need and how to run QMap.

Downloads
Click to download QMap Version 2.0

What is QMap?

QMap is a menu-driven front end to Nmap that simplifies scanning tasks.
It supports single-target scans, concurrent multi-target scans (with rate-limiting),
progress and ETA estimation, and automatic machine-readable output files (grepable / XML / all).

System Requirements (what you must install)

Nmap QMap requires the Nmap scanner. Install and ensure it’s in your PATH.

Linux (Debian/Ubuntu): sudo apt update && sudo apt install nmap -y
macOS (Homebrew): brew install nmap
Windows: Download from https://nmap.org/download.html and enable “Add Nmap to PATH”.
Go Only required if you plan to build from source. Otherwise use the provided executable.
Recommended Go ≥ 1.20. Verify with go version.
Sudo / Admin Needed only for some scan types (SYN, UDP).
Linux: use sudo.
Windows: run as Administrator.
Zip (optional) Only needed for building from source if you want ZIP archives. Not required to run QMap.

How to Run QMap (quick)

Linux:
  ./qmap

Windows:
  qmap.exe

If a scan needs privileges:
  sudo ./qmap   (Linux)

On Windows, run terminal as Administrator.
1) Run single target
   - Scan one IP or hostname.
2) Run multiple targets from file (concurrent)
   - Provide a file with one target per line (# for comments).
3) Toggle auto-elevate (sudo / runas)
4) Change default flags / choose scan
5) Show predefined flags list
6) Adjust concurrency
7) Choose output mode (None / -oG / -oX / -oA)
8) Toggle save combined output
9) Exit

Quick Examples

Example 1 — Single IP:
  1) Start QMap
  2) Choose "Run single target"
  3) Enter IP (e.g. 192.168.1.1)
  4) Choose scan flags (e.g. "Quick scan -F")
  5) View output / save

Example 2 — Multi-target:
  targets.txt:
    192.168.1.1
    scanme.nmap.org

  1) Start QMap
  2) "Run multiple targets from file"
  3) Enter targets.txt
  4) Choose flags/concurrency/output

Output Files & Where to Find Them

QMap creates timestamped files in the same directory:

  • scan-192.168.1.1-20251109-182000.txt
  • scan-192.168.1.1-20251109-182000.xml
  • combined-scan-targets-20251109-182030.txt

Tips & Troubleshooting

• "nmap: command not found" — install Nmap.
• "permission denied" — run QMap with sudo / Administrator.
• Slow scans — increase concurrency.
• Windows elevation issues — run elevated PowerShell/Command Prompt.
• Never scan networks without authorization.

Only scan systems and networks that you own or are explicitly authorized to test.
Unauthorized scanning may be illegal.

QMap — convenience front-end for Nmap. Built by K0NxT3D. Not affiliated with Nmap

Download QMAP (Version 2.0.1):

All Files Included 3.4MB
Seaverns Web Development Coding Security Applications and Software Development Bex Severus Galleries Digital Art & Photography

FreeDDNS – A Dynamic DNS Solution for Everyone

FreeDDNS: A Dynamic DNS Solution for Everyone

Dynamic DNS (DDNS) is a service that automatically updates the IP address associated with a domain name when the IP address changes. This is particularly useful for devices with dynamic IP addresses, such as home routers or servers, where the IP address is not static and can change frequently. Without DDNS, accessing these devices remotely would require manually updating the IP address each time it changes, which is impractical.

What is FreeDDNS?
FreeDDNS is a cost-effective, self-hosted Dynamic DNS solution designed to provide users with a reliable way to map a domain name to a dynamic IP address without relying on third-party services. Unlike traditional DDNS services that often come with subscription fees or limitations, FreeDDNS empowers users to create their own DDNS system using simple PHP scripts and a web server.

How FreeDDNS Works
The FreeDDNS project consists of three core scripts:

  1. fddns.php: This script runs on the local machine and sends periodic requests to a remote server. It includes the local machine’s hostname in the request, allowing the remote server to identify and log the client’s IP address.
  2. access.php: This script runs on the remote server and logs the client’s IP address and hostname. It ensures that the latest IP address is always recorded in a log file (fddns.log).
  3. index.php: This script fetches the logged IP address and hostname from fddns.log and uses it to retrieve and display web content from the client’s machine.

The process is simple:

  • The local machine sends its hostname and IP address to the remote server.
  • The remote server logs this information.
  • When accessed, the remote server uses the logged IP address to fetch content from the local machine, effectively creating a dynamic link between the domain name and the changing IP address.

Why Use FreeDDNS?

  1. Cost-Effective: FreeDDNS eliminates the need for paid DDNS services, saving you money.
  2. Customizable: Since it’s self-hosted, you have full control over the system and can tailor it to your needs.
  3. Reliable: By using simple PHP scripts and a web server, FreeDDNS ensures a lightweight and efficient solution.
  4. Easy to Implement: The scripts are straightforward and can be set up in minutes, even by users with minimal technical expertise.

FreeDDNS is the perfect solution for anyone looking to access their home network, personal server, or IoT devices remotely without the hassle of manual IP updates or expensive subscriptions. Whether you’re a tech enthusiast, a small business owner, or a hobbyist, FreeDDNS offers a reliable, customizable, and cost-effective way to stay connected. Take control of your dynamic IP challenges today with FreeDDNS—your gateway to seamless remote access.

FreeDDNS (Beta) 1.9kb
Download

Web and Software Development

Mathematical Formula Plotter Tutorial

Mathematical Formula Plotter Tutorial

Created by K0NxT3D

Welcome to the Mathematical Formula Plotter Tutorial, where we will guide you through the process of creating a simple yet powerful visualizer using Python. This tool will help you visualize electromagnetic fields using a Rodin Coil design and generate detailed graphical outputs, making it a perfect learning project for beginner to intermediate Python Developers.

Key Features:

  • Python tkinter for building the graphical user interface (GUI)
  • numpy for numerical computations
  • matplotlib for plotting electromagnetic fields
  • Pillow for basic aesthetics and visual enhancement

Mathematical Formula Plotter Tutorial
Project Overview

This tutorial focuses on creating an interactive application that generates Electromagnetic Field visualizations based on a Rodin Coil design. The plotter demonstrates the relationship between key formulas such as magnetic field strength, inductance, and resonance frequency.

You will see how these fundamental concepts come together in a practical way, helping you grasp both theoretical and computational aspects of electromagnetism.


Getting Started

The GUI is designed to be simple and easy to configure, with just a few input fields. Once you enter values for parameters like number of turns, current, and radius, the application will generate both 2D and 3D plots.

We’ll walk you through the setup process, from installation to compiling your application, step-by-step.


Recommended Level

This tutorial is ideal for beginner to intermediate Python programmers. Some basic knowledge of Python and mathematical concepts like electromagnetic fields will be helpful, but it is not required.


Rodin Coils Explained

(More About Rodin Coils Here…)
A Rodin Coil is a type of electromagnetic coil that creates a unique toroidal magnetic field. This is useful in various applications like energy generation, wireless power transfer, and electromagnetic therapy. In this tutorial, we simulate the magnetic field and other properties of a Rodin Coil using mathematical formulas and Python programming.


Files Included

The project contains the following files:

Main Directory (/):

  • mfp (Executable): The compiled version of the application.
  • mfp.py (Python Source File): The main Python script with the core functionality.
  • README (This File): Documentation for setting up and using the project.
  • requirements.txt (Python Dependencies File): The list of required Python libraries for the project.

Backgrounds (/backgrounds):

  • background.png: A background image that should be in the same directory as the executable.

Python Requirements (requirements.txt)

To run the project, you will need to install the following Python libraries:

contourpy==1.1.1
cycler==0.12.1
fonttools==4.55.3
importlib-resources==6.4.5
kiwisolver==1.4.7
matplotlib==3.7.5
numpy==1.24.4
packaging==24.2
pillow==10.4.0
pyparsing==3.1.4
python-dateutil==2.9.0.post0
six==1.17.0
zipp==3.20.2

To install these dependencies, run the following command:

pip install -r requirements.txt

Compiling Your Application Using PyInstaller

Once you’ve set up the environment, you can compile the application into a standalone executable. Follow these steps:

  1. Create a virtual environment: python3 -m venv venv
  2. Activate the virtual environment: source venv/bin/activate
  3. Install required dependencies: pip install -r requirements.txt
  4. Compile the application using PyInstaller: pyinstaller --onefile mfp.py

Note: You’ll need to install PyInstaller if you don’t have it already:
pip install pyinstaller

Known Issues and Notes

  • matplotlib might take a little longer to load on the first run due to its initialization process.
    Please be patient.

Download:

mathematical_formula_plotter_tutorial.zip


Once the compilation is complete, you’ll have a fully functional Mathematical Formula Plotter application that you can run on any compatible system.


That’s all folks!

This tutorial offers a straightforward approach to creating a powerful visualization tool for electromagnetism.
By leveraging Python, matplotlib, and numpy, you can simulate complex fields and explore various scientific concepts interactively.

Thanks for following along, and we hope this guide helps you build a deeper understanding of mathematical visualizations!
K0NxT3D

Contacts Database and Forms Template

Contacts Database and Forms Template

Mastering Contact Management with Flask: A Guide to the Contacts Database and Forms Template

Contacts Database and Forms Template
Author
: K0NxT3D

In this guide, we will explore a practical and effective Flask template that allows beginner to intermediate Python developers to manage contact information easily. The Contacts Database and Forms Template is designed to simplify the process of building a database-driven application using Flask, SQLite, and SQLAlchemy. Whether you are new to Flask or looking to streamline your existing projects, this template is an excellent starting point for your next app.

Introduction to Flask and SQLAlchemy

Flask is a lightweight Python web framework that helps developers build web applications quickly with minimal effort. SQLAlchemy is an ORM (Object-Relational Mapping) tool for Python, which allows developers to interact with databases using Python objects instead of raw SQL queries. In this template, we leverage Flask and SQLAlchemy to create a simple but powerful Contact Management System.

Key Features of the Contacts Database and Forms Template

  • Flask-based Web Application: Built with Flask, this template offers an easy-to-understand, scalable foundation for building dynamic web applications.
  • SQLite Integration: By default, this template uses SQLite, a lightweight database engine, perfect for development and small projects.
  • Forms for Data Entry: The application provides forms for adding, viewing, and editing contact information, making it highly user-friendly.
  • Internal and External File Management: Organize static files such as images and JavaScript files to keep your app structure neat.

Core Concepts and Structure of the Template

The application consists of several components that make it functional and user-friendly:

  1. Flask Setup and Configuration: The app is configured to run on port 32034 by default. The database connection is established using SQLite, ensuring that data can be stored locally in a file named default.db.
  2. The Contact Information Model: The core of this application is the ContactInfo model, defined using SQLAlchemy. This model includes fields for:
    • Name
    • Address
    • City
    • State
    • Zip Code
    • Phone
    • Email
  3. Database Operations: Using SQLAlchemy, this template performs basic CRUD operations:
    • Create: Users can add new contacts through a form.
    • Read: Contacts are displayed in a dropdown for viewing or editing.
    • Update: Contact information can be updated with new details.
  4. User Interface with Jinja Templates: The HTML content is dynamically generated using Jinja, Flask’s templating engine. This enables the app to display content such as contact details, forms, and menus based on user input.

Step-by-Step Walkthrough

1. Running the Application

The application starts by opening a browser window pointing to http://127.0.0.1:32034, allowing users to interact with the interface directly. It offers three main actions:

  • Enter Contact Information: A form to add new contact details.
  • View Contact Information: A dropdown menu to select a contact and view their details.
  • Edit Contact Information: Allows users to select and modify existing contact information.

2. Adding Contacts

The add_contacts route enables users to input their contact details through a user-friendly form. Upon submitting the form, the data is saved to the database, and the user is redirected to a success page that displays the entered information.

Example form fields include:

  • Full Name
  • Address
  • City
  • State
  • Zip Code
  • Phone
  • Email

3. Viewing Contacts

The view_contacts route allows users to select a contact from a dropdown menu and view their details. When a contact is selected, their information is displayed in a neat format, and clickable links are provided for phone numbers and email addresses.

4. Editing Contacts

The edit_contacts route allows users to update the details of an existing contact. The user selects a contact, modifies the information, and submits the updated details. The changes are then saved back to the database.

5. Exiting the Application

For developers testing or experimenting with this application, the exit_app route provides an option to shut down the Flask application gracefully with a delayed redirect.

Advantages for Python Beginners and Intermediate Developers

  • Beginner-Friendly: The template is simple enough for newcomers to Flask and Python to understand and build upon. It comes with detailed comments explaining each step of the process.
  • Database Integration Made Easy: The integration of SQLite and SQLAlchemy allows you to get started with databases without the complexity of more advanced systems like PostgreSQL or MySQL.
  • Extensibility: The structure is flexible, enabling you to add more functionality like user authentication, advanced search features, or exporting contact data to CSV or Excel formats.

How to Customize and Extend the Template

As a beginner or intermediate Python developer, you might want to extend this template to suit your specific needs. Here are a few ideas for customization:

  1. User Authentication: Integrate Flask-Login or Flask-Security to manage user accounts and restrict access to the contact management features.
  2. Enhanced Search Functionality: Add search features to allow users to filter contacts based on certain criteria (e.g., by name, city, or email).
  3. Exporting Data: Implement features to export the contact data into formats like CSV or Excel, allowing users to back up or share their contact lists.

Contacts Database and Forms Template – Included Files:

  • app.py
  • requirements.txt (For Python Module Dependencies)
  • base.html (HTML Template File)
  • default.css
  • Image Files
  • genreq.py *

* Custom Python script which generates a requirements.txt if pip should be problematic.
More Here…

Contacts Database and Forms Template Download:

The Contacts Database and Forms Template is a perfect starting point for beginner to intermediate Python developers looking to build a simple Flask application with database integration. It demonstrates essential concepts like database models, form handling, and template rendering, providing a solid foundation for further development. Whether you’re learning Flask or building a contact management app, this template is a versatile tool for your Python projects.

Explore it, customize it, and make it your own—this template is just the beginning of your web development journey!

DaRK Development And Research Kit 3.0 Scraper Crawler Preview Webmaster Utilities

Stand Alone Flask Application

Stand Alone Flask Application Template By K0NxT3D

The Stand Alone Flask Application Template is a minimal yet powerful starting point for creating Flask-based web UI applications. Developed by K0NxT3D, this template is designed to run a Flask app that can be deployed easily on a local machine. It features an embedded HTML template with Bootstrap CSS for responsive design, the Oswald font for style, and a simple yet effective shutdown mechanism. Here’s a detailed look at how it works and how you can use it.


Stand Alone Flask Application – Key Features

  1. Basic Flask Setup
    The template leverages Flask, a lightweight Python web framework, to build a minimal web application. The app is configured to run on port 26001, with versioning details and a friendly app name displayed in the user interface.
  2. Embedded HTML Template
    The HTML template is embedded directly within the Flask application code using render_template_string(). This ensures that the application is fully self-contained and does not require external HTML files.
  3. Bootstrap Integration
    The application uses Bootstrap 5 for responsive UI components, ensuring that the application adapts to different screen sizes. Key elements like buttons, form controls, and navigation are styled with Bootstrap’s predefined classes.
  4. Oswald Font
    The Oswald font is embedded via Google Fonts, giving the application a modern, clean look. This font is applied globally to the body and header elements.
  5. Shutdown Logic
    One of the standout features is the built-in shutdown mechanism, allowing the Flask server to be stopped safely. The /exit route is specifically designed to gracefully shut down the server, with a redirect and a JavaScript timeout to ensure the application closes cleanly.
  6. Automatic Browser Launch
    When the application is started, the script automatically opens the default web browser to the local Flask URL. This is done by the open_browser() function, which runs in a separate thread to avoid blocking the main Flask server.

How The Stand Alone Flask Application Works

1. Application Setup

The core setup includes the following elements:

TITLE = "Flask Template"
VERSION = '1.0.0'
APPNAME = f"{TITLE} {VERSION}"
PORT = 26001
app = Flask(TITLE)

This sets the title, version, and application name, which are used throughout the app’s user interface. The PORT is set to 26001 and can be adjusted as necessary.

2. Main Route (/)

The main route (/) renders the HTML page, displaying the app title, version, and a button to exit the application:

@app.route('/', methods=['GET', 'POST'])
def index():
return render_template_string(TEMPLATE, appname=APPNAME, title=TITLE, version=VERSION)

This route serves the home page with an HTML template that includes Bootstrap styling and the Oswald font.

3. Shutdown Route (/exit)

The /exit route allows the server to shut down gracefully. It checks that the request is coming from localhost (to avoid unauthorized shutdowns) and uses JavaScript to redirect to an exit page, which informs the user that the application has been terminated.

@app.route('/exit', methods=['GET'])
def exit_app():
if request.remote_addr != '127.0.0.1':
return "Forbidden", 403
Timer(1, os._exit, args=[0]).start() # Shutdown Server
return render_template_string(html_content, appname=APPNAME, title=TITLE, version=VERSION)

This section includes a timer that schedules the server’s termination after 1 second, allowing the browser to process the redirect.

4. HTML Template

The embedded HTML template includes:

  • Responsive Design: Using Bootstrap, the layout adapts to different devices.
  • App Title and Version: Dynamically displayed in the header.
  • Exit Button: Allows users to gracefully shut down the application.
<header>
<span class="AppTitle" id="title">{{title}} {{version}}</span>
</header>

This structure creates a clean, visually appealing user interface, with all styling contained within the app itself.

5. Automatic Browser Launch

The following function ensures that the web browser opens automatically when the Flask app is launched:

def open_browser():
webbrowser.open(f"http://127.0.0.1:{PORT}")

This function is executed in a separate thread to avoid blocking the Flask server from starting.


How to Use the Template

  1. Install Dependencies:
    Ensure that your requirements.txt includes the following:

    Flask==2.0.3

    Install the dependencies with pip install -r requirements.txt.

  2. Run the Application:
    Start the Flask application by running the script:

    python app.py

    This will launch the server, open the browser to the local URL (http://127.0.0.1:26001), and serve the application.

  3. Exit the Application:
    You can shut down the application by clicking the “Exit Application” button, which triggers the shutdown route (/exit).

Why Use This Template?

This template is ideal for developers looking for a simple and straightforward Flask application to use as a base for a web UI. It’s particularly useful for local or single-user applications where quick setup and ease of use are essential. The built-in shutdown functionality and automatic browser launch make it even more convenient for developers and testers.

Additionally, the use of Bootstrap ensures that the UI will look good across all devices without requiring complex CSS work, making it a great starting point for any project that needs a web interface.


The Stand Alone Flask Application Template by K0NxT3D is an efficient and versatile starting point for building simple Flask applications. Its integrated features, including automatic browser launching, shutdown capabilities, and embedded Bootstrap UI, make it a powerful tool for developers looking to create standalone web applications with minimal setup.