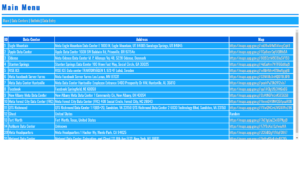
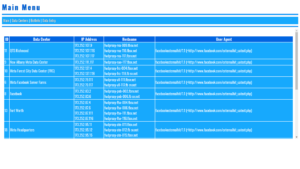
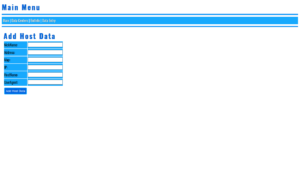
Stand Alone Flask Application
Stand Alone Flask Application Template By K0NxT3D
The Stand Alone Flask Application Template is a minimal yet powerful starting point for creating Flask-based web UI applications. Developed by K0NxT3D, this template is designed to run a Flask app that can be deployed easily on a local machine. It features an embedded HTML template with Bootstrap CSS for responsive design, the Oswald font for style, and a simple yet effective shutdown mechanism. Here’s a detailed look at how it works and how you can use it.
Stand Alone Flask Application – Key Features
- Basic Flask Setup
The template leverages Flask, a lightweight Python web framework, to build a minimal web application. The app is configured to run on port 26001, with versioning details and a friendly app name displayed in the user interface. - Embedded HTML Template
The HTML template is embedded directly within the Flask application code usingrender_template_string(). This ensures that the application is fully self-contained and does not require external HTML files. - Bootstrap Integration
The application uses Bootstrap 5 for responsive UI components, ensuring that the application adapts to different screen sizes. Key elements like buttons, form controls, and navigation are styled with Bootstrap’s predefined classes. - Oswald Font
The Oswald font is embedded via Google Fonts, giving the application a modern, clean look. This font is applied globally to the body and header elements. - Shutdown Logic
One of the standout features is the built-in shutdown mechanism, allowing the Flask server to be stopped safely. The/exitroute is specifically designed to gracefully shut down the server, with a redirect and a JavaScript timeout to ensure the application closes cleanly. - Automatic Browser Launch
When the application is started, the script automatically opens the default web browser to the local Flask URL. This is done by theopen_browser()function, which runs in a separate thread to avoid blocking the main Flask server.
How The Stand Alone Flask Application Works
1. Application Setup
The core setup includes the following elements:
This sets the title, version, and application name, which are used throughout the app’s user interface. The PORT is set to 26001 and can be adjusted as necessary.
2. Main Route (/)
The main route (/) renders the HTML page, displaying the app title, version, and a button to exit the application:
This route serves the home page with an HTML template that includes Bootstrap styling and the Oswald font.
3. Shutdown Route (/exit)
The /exit route allows the server to shut down gracefully. It checks that the request is coming from localhost (to avoid unauthorized shutdowns) and uses JavaScript to redirect to an exit page, which informs the user that the application has been terminated.
This section includes a timer that schedules the server’s termination after 1 second, allowing the browser to process the redirect.
4. HTML Template
The embedded HTML template includes:
- Responsive Design: Using Bootstrap, the layout adapts to different devices.
- App Title and Version: Dynamically displayed in the header.
- Exit Button: Allows users to gracefully shut down the application.
This structure creates a clean, visually appealing user interface, with all styling contained within the app itself.
5. Automatic Browser Launch
The following function ensures that the web browser opens automatically when the Flask app is launched:
This function is executed in a separate thread to avoid blocking the Flask server from starting.
How to Use the Template
- Install Dependencies:
Ensure that yourrequirements.txtincludes the following:Install the dependencies with
pip install -r requirements.txt. - Run the Application:
Start the Flask application by running the script:This will launch the server, open the browser to the local URL (
http://127.0.0.1:26001), and serve the application. - Exit the Application:
You can shut down the application by clicking the “Exit Application” button, which triggers the shutdown route (/exit).
Why Use This Template?
This template is ideal for developers looking for a simple and straightforward Flask application to use as a base for a web UI. It’s particularly useful for local or single-user applications where quick setup and ease of use are essential. The built-in shutdown functionality and automatic browser launch make it even more convenient for developers and testers.
Additionally, the use of Bootstrap ensures that the UI will look good across all devices without requiring complex CSS work, making it a great starting point for any project that needs a web interface.
The Stand Alone Flask Application Template by K0NxT3D is an efficient and versatile starting point for building simple Flask applications. Its integrated features, including automatic browser launching, shutdown capabilities, and embedded Bootstrap UI, make it a powerful tool for developers looking to create standalone web applications with minimal setup.